See Vanessa Craft

A Life Well Lived: Crafts, Recipes, Parties, Home, Travel

  • Email
  • Facebook
  • Google+
  • Instagram
  • Pinterest
  • Twitter
  • YouTube
  • Home
  • About Me
    • Contact
  • Recipes
    • breakfast
    • dessert
    • main dish
    • healthy recipes
  • Crafts & DIY
    • crafts
    • edible crafts
    • gift ideas
    • printables
    • diy
    • home decor
  • Parties
    • children’s parties
    • birthday parties
    • baby showers
  • Holidays
    • new year’s eve
    • valentine’s day
    • superbowl
    • st. patrick’s day
    • easter
    • cinco de mayo
    • mother’s day
    • teacher appreciation
    • 4th of july
    • halloween
    • thanksgiving
    • christmas
  • Travel
  • Disney
  • My Book
You are here: Home / tutorials / guest blogger tutorials / (20 crafty days of halloween) front door spooky eyes

(20 crafty days of halloween) front door spooky eyes

October 6, 2012 By Vanessa 2 Comments

Day 6! My blogging buddy, Steph from Crafting In The Rain is showing us how to decorate our front doors and windows with spooky eyes. I’m so doing this to all of our windows for Halloween! Don’t forget to link up your Halloween crafts, recipes and decor HERE.

Thanks for inviting me to your series Vanessa!   I’m letting everyone see today how I brought spooky to my front door.

Materials:

Black posterboard (I bought 3 sheets from the dollar store at 69c each)
Exacto knife and a self healing cutting mat or cardboard to protect your work surface
Yellow or green tissue paper
Tape and glue

Instructions:

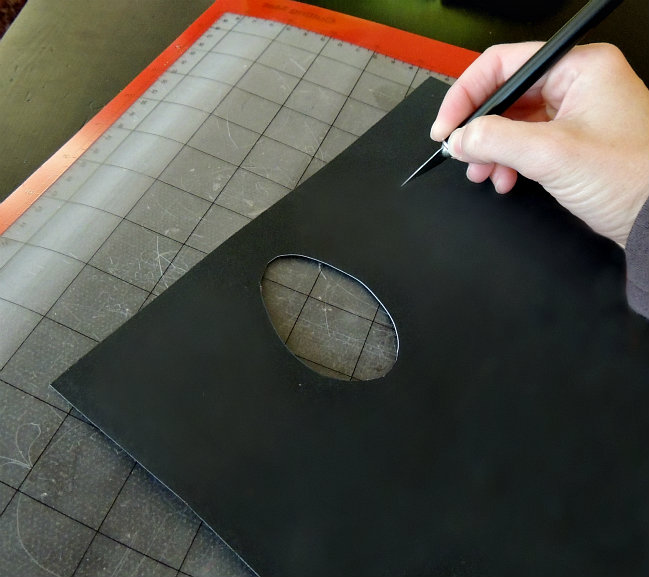
Step 1: Cut your poster board into strips that will fit in your window and cover them completely…but don’t tape them in yet.
Lay the strips out on a cutting mat or piece of cardboard and cut out some spooky eye shapes with the exacto knife.  You can find some images online for reference, or even print some out to trace exactly.  But you don’t need perfection here.


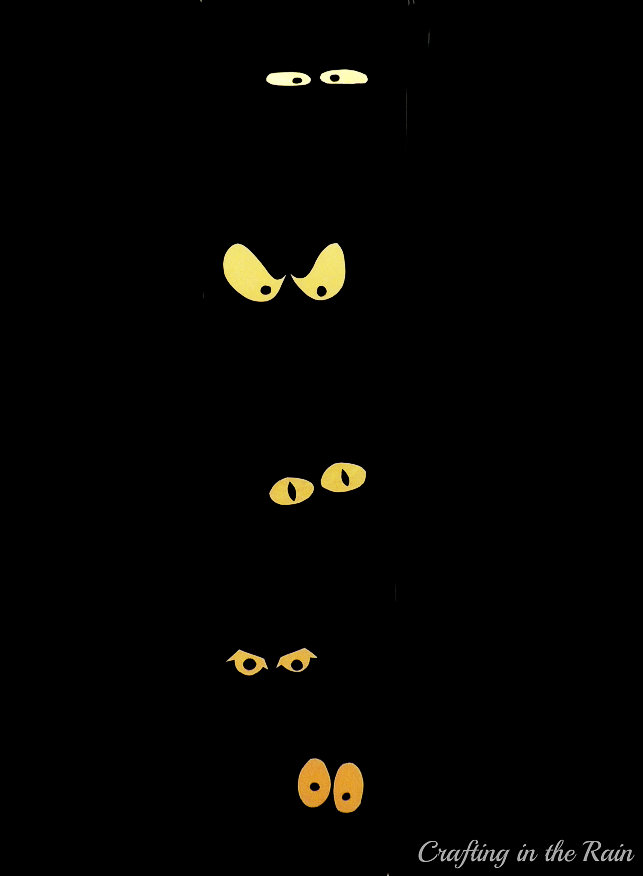
Step 2: Cover each cut opening with your colored tissue paper, securing with tape. Cut small circles and ovals to glue onto the tissue paper as pupils in your eyes.


Step 3: Put the posterboard up into your window and tape in place.  When the lights are on in your house and it’s dark outside, each set of eyes will glow through the window!  For me, it’s the perfect Halloween decoration because it doesn’t involve spiders 🙂  Happy Halloween!


Hey everyone.  I’m Steph from Crafting in the Rain.  We live in the Pacific Northwest, so when it’s rainy outside, I find all kinds of ways to keep my hands busy inside.  My blog is a smattering of paper crafts, sewing, recipes and kid fun. If you liked this idea, you may like my painted window screens too-come check them out!

You Might Also Like

  • (20 crafty days of halloween) pumpkin paper crafts(20 crafty days of halloween) pumpkin paper crafts
  • (20 crafty days of halloween) candy corn popcorn (20 crafty days of halloween) candy corn popcorn
  • (20 crafty days of halloween) skeleton mask (20 crafty days of halloween) skeleton mask
  • (20 crafty days of halloween) beware garland(20 crafty days of halloween) beware garland
The following two tabs change content below.
  • Bio
  • Latest Posts
My Twitter profileMy Facebook profileMy Google+ profileMy Instagram profileMy Pinterest profileMy YouTube channel

Vanessa

I'm Vanessa and it's my mission in life to spread my love of hot glue guns and glitter to others. I suffer from craft ADHD, regularly working on at least 10 projects at the same time and my craft room looks like a tornado hit it. My first craft book, Party in a Jar, was published in 2014. I look forward to crafting with you!
My Twitter profileMy Facebook profileMy Google+ profileMy Instagram profileMy Pinterest profileMy YouTube channel

Latest posts by Vanessa (see all)

  • Craft: DIY How to Train Your Dragon Headband - February 17, 2019
  • Valentine’s Day: Cat Headband Printable Valentine Tags - February 11, 2019
  • Valentine’s Day: Printable Valentine Sock Gift Wrapper for Kids - February 10, 2019
  • Kid Friendly: Morning Routine Chore Chart Printable - January 28, 2019

Filed Under: guest blogger tutorials, halloween, tutorials Tagged With: 20 Crafty Days of Halloween, DIY, DIY Tutorials, Guest Blogger, Halloween

Never Miss A Post!

« (20 crafty days of halloween) purple people eater pop
(20 crafty days of halloween) trick or treat footprint art »

Comments

  1. Britney {Jesse's Girl} says

    October 6, 2012 at 7:15 pm

    What a unique idea! I love it!
    Britney {Jesse’s Girl} recently posted..Halloween Advent & Crafting With A ToddlerMy Profile

    Reply
  2. Kelly Griglione says

    October 6, 2012 at 8:24 pm

    oh my, I LOVE this idea! It will be perfect for the tiny side windows on either side of our door (and I’ll just need a sheet or two of black cardstock). Great for the trick-or-treaters. I want to go make some of these NOW!! Thanks for sharing!

    Reply

Leave a Reply Cancel reply

Your email address will not be published. Required fields are marked *

CommentLuv badgeShow more posts

This site uses Akismet to reduce spam. Learn how your comment data is processed.

My Latest Videos!

Never Miss A Post!

Popular

(diy tutorial) valentine’s doily bunting

(diy tutorial) valentine’s doily bunting

(printable) nerds candy valentine

(printable) nerds candy valentine

Seasonal

Craft: Hulk Glitter Slime

Craft: Hulk Glitter Slime

(roundup) 15 st. patrick’s day desserts

(roundup) 15 st. patrick’s day desserts

Instagram

Load More...
Follow on Instagram

Find It Here

Archives

Categories

Contact Me

Have a question or just want to say hello? I'd love to hear from you! Send me an email at seevanessacraft@gmail.com

Copyright © 2019 · Tasteful theme by Restored 316

Copyright © 2019 See Vanessa Craft · Log in

»
«