(guest tutorial) dry erase i-spy bag

Share on pinterest
Pinterest
Share on facebook
Facebook
Share on twitter
Twitter
Christmas Banner copy

On the 8th day of Christmas
I welcome Brandy of Gluesticks to The Crafty Nest. I could spend hours and hours on Brandy’s blog! Brandy is here to show us how to make a fun gift for your little ones. Such a creative idea, I’m going to have to break out my sewing machine and make one to put in Logan’s stocking.

Hello Crafty Nest Readers! I’m Brandy and am the creator of Gluesticks, a blog about all things domestic. I am a wife to an active duty member of the US Coast Guard, and mother of 4. Our blog is chalked full of fun projects and activities that keep us busy!

Today I would like to share a fun project that I created for my boys. I loved the idea of the I-Spy bags that I had seen around, but wanted something that appealed to my younger son who was too young to read. Enter: The Dry Erase I-Spy Bag! Perfect for children of all ages!


Materials

Pinking Shears (optional)
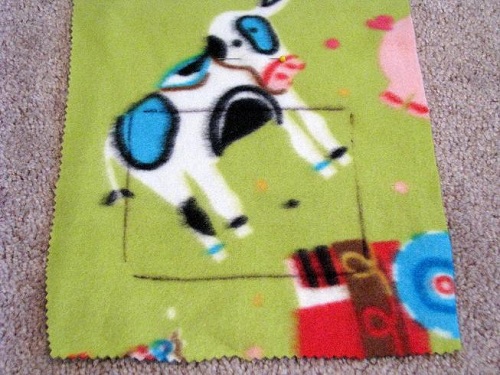
Fleece piece ( 8.5″ x 16″ )

Fleece piece (8.5″x6″ ) for pocket

Rice
Odds and ends (buttons, erasers, etc.)
Piece of paper cut down to 4 1/2″ x 5 1/2″ (this will be your window opening pattern)
Dry Erase MarkerPlastic Vinyl ( 5″x6″ ). I used some vinyl from a bag that a shower curtain came in.


Directions
Step 1:I arranged all of the objects on a sheet of white paper and snapped a photo. I had it printed to a 4×6 photo and then laminated it so that it would be wipe able.

Step 2: Mark the center of your fleece with a pin. Take your window pattern piece (4 1/2″ x 5 1/2″) and place it in the center of the bottom half of the fleece.

Step 3: Trace around it with a marker, then cut out the center square.
Step 4: Lay your vinyl on top, then flip it over and pin it. I know it would be easier to pin it while it is on top, but it is much easier to sew with the vinyl on the bottom and easier to take the pins out when they are on top while you are sewing.
Step 5: Line up the foot of your sewing machine with the edge of the window (3/8″) and stitch around window (making sure that the vinyl is facing down. It sews smoothly this way).


Step 6: Fold your pocket piece over 1/2″ and stitch across to hem the top.


Step 7: Place the pocket piece to the fleece on the opposite end of the vinyl window.
Step 8: Sew the pocket for your dry erase marker by measuring 1 1/2″ in and stitching from the top of the pocket to the bottom.


Step 9: Then fold your fleece in half (right sides inside) and stitch all the way around, leaving a small section open for turning right side out. I used a 3/8” seam.


Step 10: Clip corners and trim seam. Then turn right side out and fill with your I-Spy objects and 1/2 way full with rice.
Step 11: Turn under the opening and pin closed. Top stitch around the entire bag, catching the opening as you stitch. Be careful to shake all of the rice to the bottom of the bag so that it doesn’t end up in your seams. It WILL break your sewing machine needle if it is sewn over (I know this from experience).

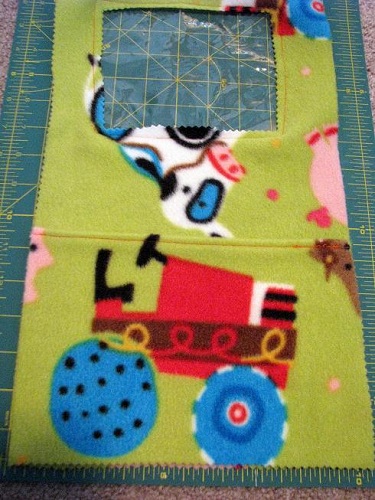
Turn over and add your dry erase photo and marker in their designated pockets and you are DONE! The boys have had a great time finding the objects and swapping bags with each other!

For more projects like this, visit Gluesticks! Thank you for letting me stop by Vanessa!


Pin It

Brought to you by:

Linking up at:
Tip  Junkie handmade projectsJoin  us Saturdays at tatertotsandjello.com for the weekend wrap up     party!Todays Creative Blog

The Girl CreativeThirty Hand Made Days


You Might Also Like

Leave a Reply

Your email address will not be published. Required fields are marked *

This site uses Akismet to reduce spam. Learn how your comment data is processed.

profile-pic

Hi, I'm Vanessa!

Welcome to See Vanessa Craft! I’m Vanessa, an MSSW and mom of two in Arizona, and I’m happy you’re here to get inspired with me. It’s my mission in life to spread creativity through crafts, recipes, travel and more in order to live a life well lived.

CREATIVITY IN YOUR INBOX