There’s only a few more crafting days left until the 25th, so get out those glue guns and get going! I’m not a traditional red and green type of girl when it comes to the holidays. Our tree is done up in browns, blues, and greens, with birdie accents, to match our home decor. It’s a bit difficult to find holiday decor that will fit into this color scheme, so I’ve been making my own throughout the years. This year, I added to my collection and made a mod Christmas ornament shadow box. Here’s how you do it… Materials
Shadow Box Frame (I used the RIBBA frame from Ikea)
Cardstock
Foam Ornaments (2 different colors)
Hot Glue
Knife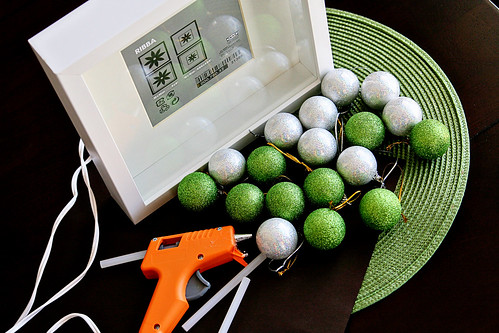
Cardstock
Foam Ornaments (2 different colors)
Hot Glue
Knife
Directions
Step 1:Cut the piece of cardstock down to fit inside of the shadow box.

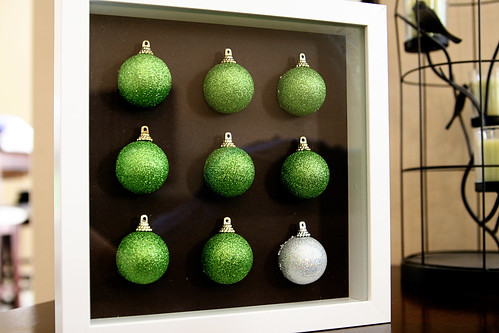
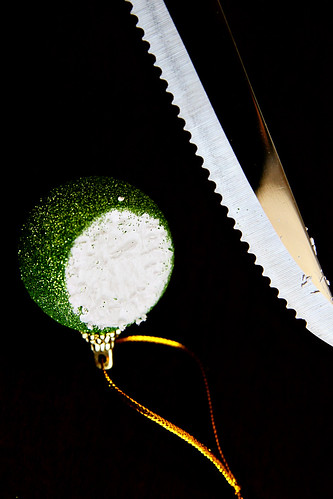
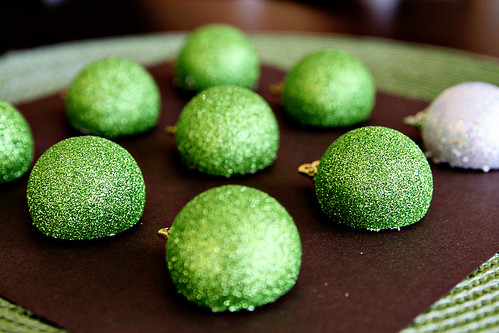
Step 2: Cut off the strings attached to the ornaments if present. Using a knife, chop off the sides of the ornaments so they can lay flat. Cut off just enough so they are able to fit in the shadow box when it is closed. For my frame, I used 8 green ornaments and 1 silver.

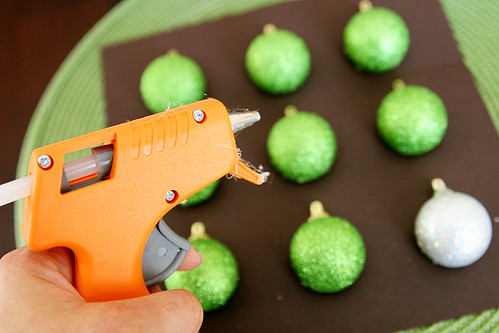
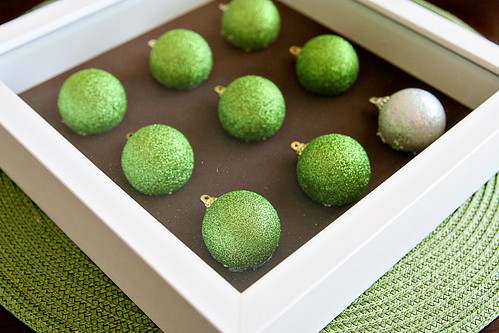
Step 3: Glue the ornaments, flat side down, to the cardstock in perfect rows. I glued 3 across and 3 down, gluing a different colored ornament in the bottom right hand corner.Tip: You may want to get out a straight edge to line up your ornaments in straight rows (my last ornament was slightly off because I just eyeballed it).
Step 4: Place cardstock with ornaments in shadow box.
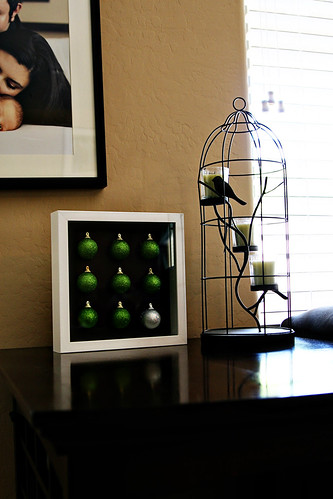
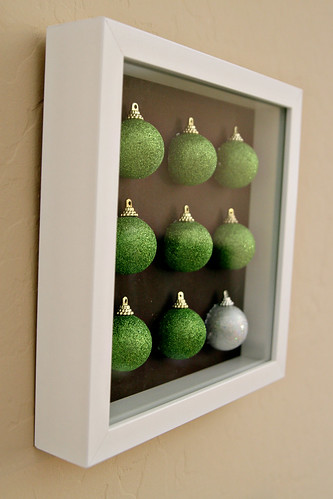
Step 5: Place shadow box on a tabletop or hang on your wall to display.


2 Responses
you can use a large styrofoam cone and hot glue or pin them to it until coeervd. this makes a nice decoration for a mantle, cofee table or an entry table. You can also use it to attach small envelopes with giftcards in. another thing that I have done is decoupage photos onto them and affix them to the bows of gifts to the grandparents. this gives them a new ornament for their tree that shows off their grandkids.
I really like this display! And knowing that I could complete it in an afternoon puts it high on my list. Thanks so much for this tutorial–I’m a year behind, but glad I came across it now, in time for Christmas 2012.