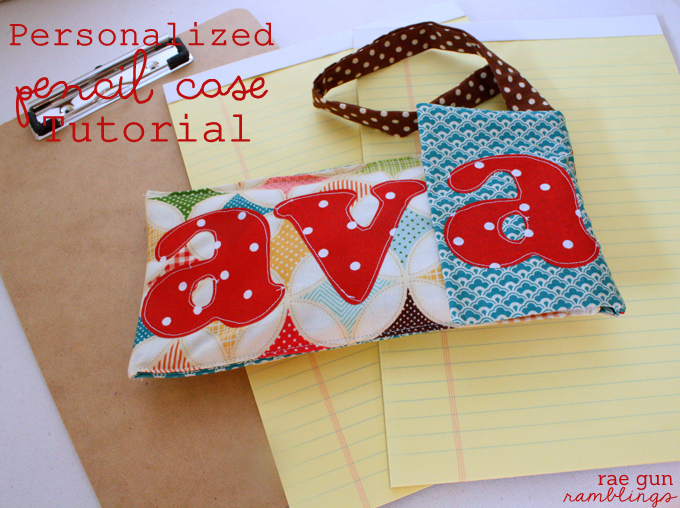
I’m Marissa from Rae Gun Ramblings and I’m so excited to be back here sharing a fun Back to School project – personalized pencil cases. I love this project because not only is it quick and easy but it’s a good way to use the scraps that I just can’t get myself to get rid of.
To make a pencil case you’ll need:
- outer fabric 6″ x 25″
- lining/flap fabric 6″ x 25″
- Strap fabric 4″x 10″
- sew on snap
- rick rack 6″
- Applique fabric
- Heat bond
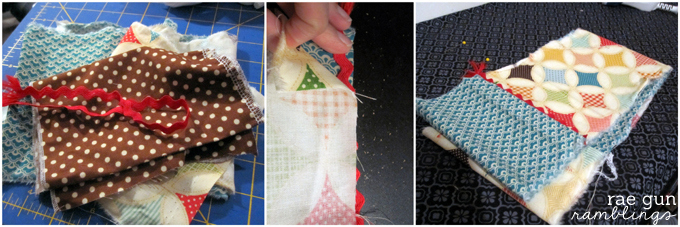
Start by sandwiching the rick rack between the right sides of the short end of the fabric. Sew down catching the rick rack. Sew the other short sides together so you have a tube and when right side out it looks like the picture above.
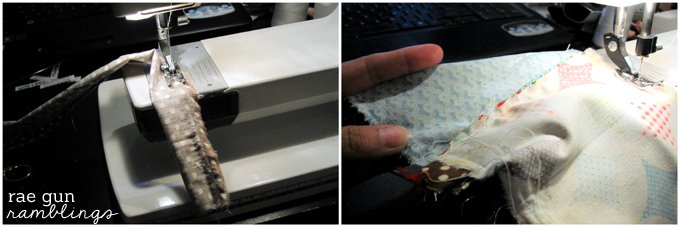
Make the strap by folding the strap fabric in half lengthwise and sewing down the long side. Flip right side out the strap and iron. Turn the main fabric and fold so that you have a few inches of the lining fabric hanging above the outer fabric and position the strap ends at the top of the outer fabric. You want the raw ends sticking out and the folded loop inside. Sew down both sides starting at the flap edge leaving a hole to flip right side out on one of the sides.
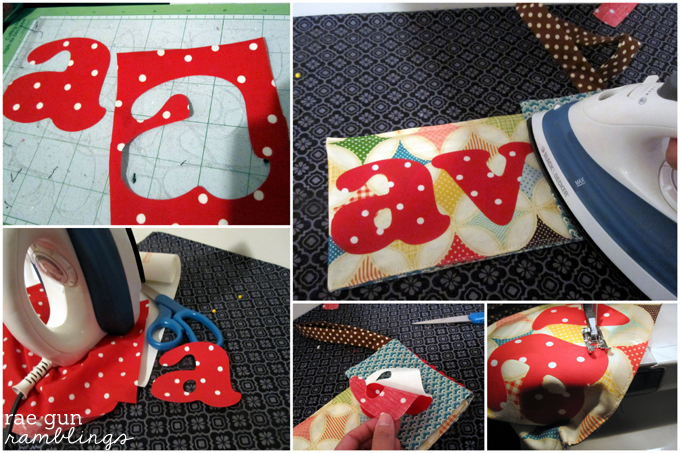
Make the applique by ironing on heat bond onto your applique fabric. If you’ve never done that before check out my how to make an iron-on tutorial. I like to cut my iron-ons out on my Cricut cutting machine but you can also do it with scissors. If you want to see how to cut it out on a cutting machine I have a tutorial for that here.
Once your applique is made, fold the bag how it will be when finished, position the applique pieces and then iron down. The hold should be permanent but I like to top stitch them just to add a little extra detail.

Now with the pouch folded so that one the fold hangs over sew up the sides (don’t catch the flap). Sew on a snap and you’re good to go. Hope you like it. You can tweak the size of the pouch very easily making this perfect for all kinds of bags and gifts.

Thanks so much to Vanessa for having me while she gets use to life with her sweet little girl. I’d love you guys to visit me over at Rae Gun Ramblings where I blog about all thing crafty, delicious, and bookish and over at my Etsy shop where I sell handmade baby clothes and fan stuff for YA readers.


One Response
Thanks so much for having me!