
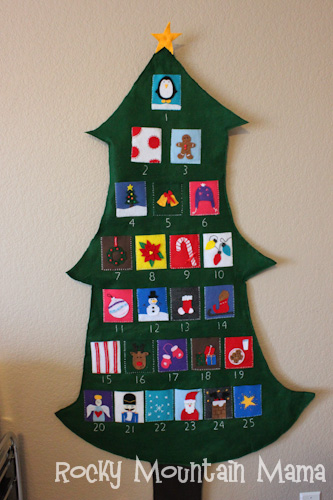

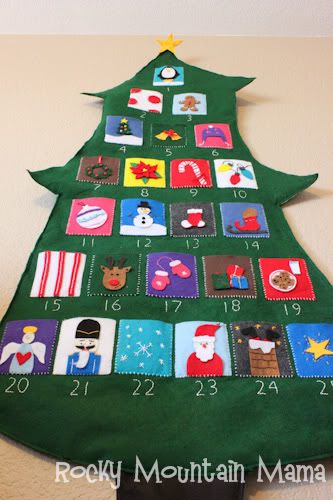
Get out your felt and scissors, because Rocky Mountain Mama is showing us how to make an advent calendar. She was inspired by Pottery Barn’s Telluride Advent Calendar, but managed to make it for much less than the PB price tag. Oh how I love knock off crafts! After your advent calendar is hung, head on over to the Rocky Mountain Mama blog to learn how to frame a bathroom mirror yourself.
Hello! I am the author of Rocky Mountain Mama. I am married to my best friend and I am a part-time working mother to 2.5-year-old Christopher. I blog about balancing life as a working mother and dealing with all the stresses that come with it. When I do find “me” time, I am either organizing or working on one of many craft projects.
Last year, I found this advent calendar on Pottery Barn Kids website. I immediately fell in love, but I could not bring myself to spend the $70, plus $7 for personalization. And then shipping on top of that? Then I got to thinking, could I possibly make this? I did a little research and found more inspiration online. I made a list of my materials and went for it. Yes, I began this project last year. No, it should not take that long. It can easily be completed in a couple of weekends…I just have ADD when it comes to craft projects.
Materials
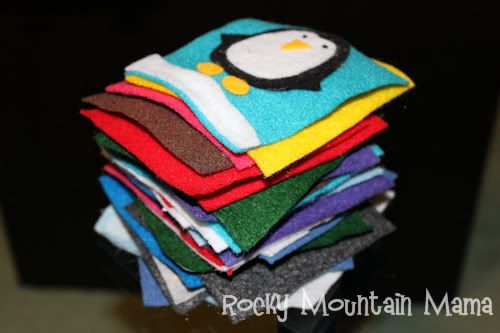
sheets of felt {variety of colors}
craft thread {variety of colors}
fusible interfacing
scissors
fabric glue or Lite Steam-A-Seam2
iron-on transfer pencil
batting
{Remember, when buying materials, look for sales and coupons! Craft stores are always having sales.}
Directions
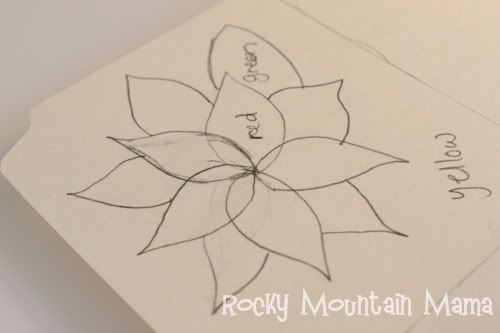
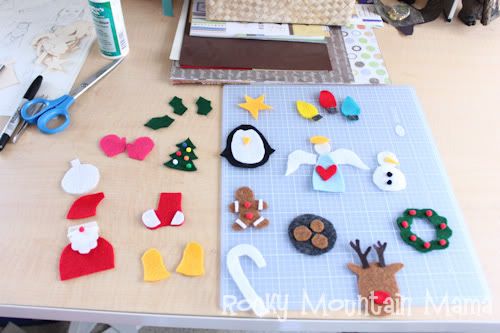
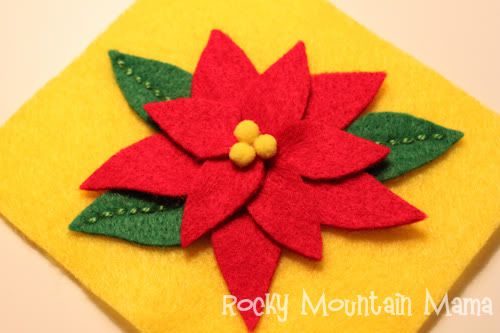
Step 1: Make a list of the 25 different pockets you would like to make. I researched “advent calendars” online to get my ideas. Once I had my list, I started making my templates. {I use old file folders to make my templates.}

Step 2: Make one template for your pockets – mine are 4×3.5 inches. Then make templates for your pocket designs. I divided up my file folders and then started drawing. This is where you can make mistakes – if you don’t like something, change it!
As I was sketching, I was writing down what colors of felt I would need that way I would only {hopefully} have to make one trip to the store. {Keep in mind that we will be hand stitching over many of your designs, so don’t make them too small.}

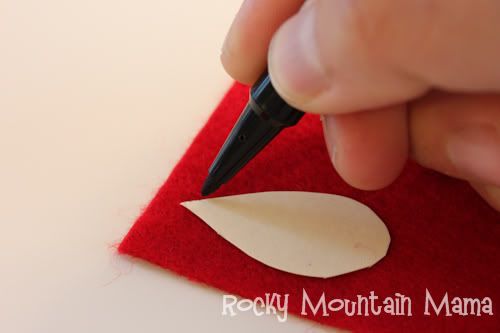
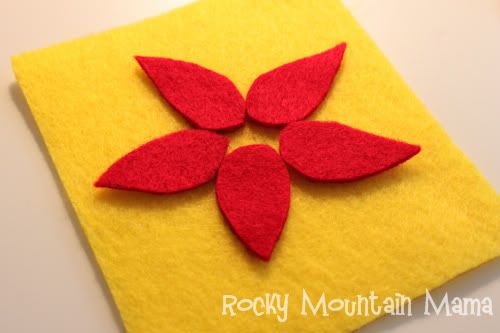
Step 3: Cut out all your templates. Then start tracing onto felt. {I found that a felt tip pen or marker is easiest.}
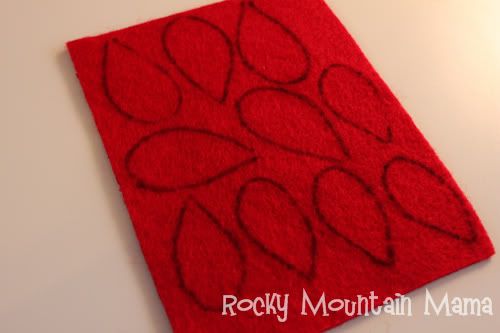
Step 4: Once you have all your pieces cut out, start assembling. I didn’t glue anything until I was happy with how everything looked.
Step 5: Use fabric glue to glue all your pieces together and then to glue your designs onto your squares. {Do not use a lot of glue! Just like I tell my kids – just a dot, not a lot…just enough to hold your pieces in place. The reason for this is, it is really hard to push a needle through a thick glob of glue when you are stitching.} You may not need to glue down every piece either as we will be hand stitching later.

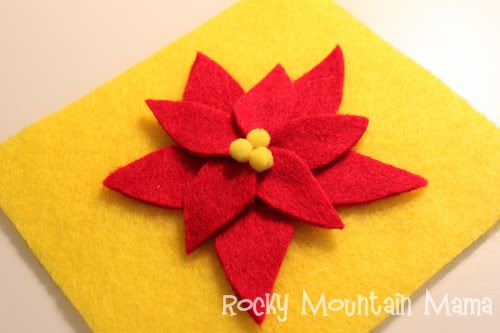
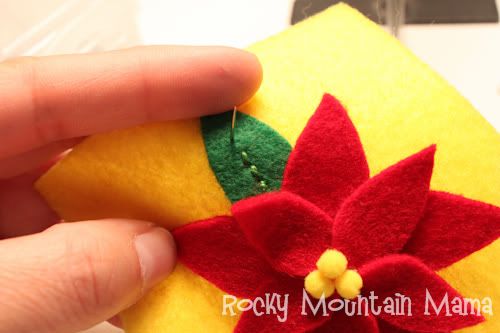
Step 6: Now it’s time to start stitching! This step takes the longest, but if you grab a glass of wine and do it in front of the TV, it goes a lot quicker. Here is a great tutorial for hand stitching. Now is the time to also add any other embellishments using fabric glue {pom poms, bells, etc.}.
Take your time and have fun with it! As you go, you will become more and more inspired and may find new places to add stitching. {You may have to undo some of your stitching if you aren’t happy with it, so make sure you tie off each individual shape as you go so that you don’t have to undo the entire thing.}
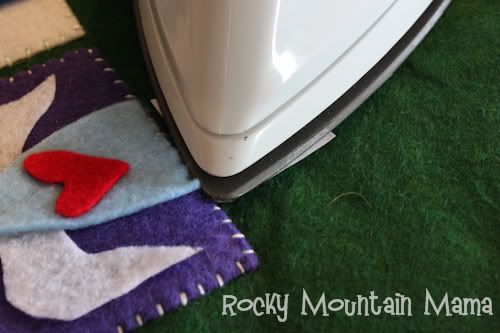
Step 7: Iron fusible interfacing onto the back of your squares. This will help to hold the stitching together and keep your pockets nice and strong. Cut your fusible interfacing just smaller than your squares.

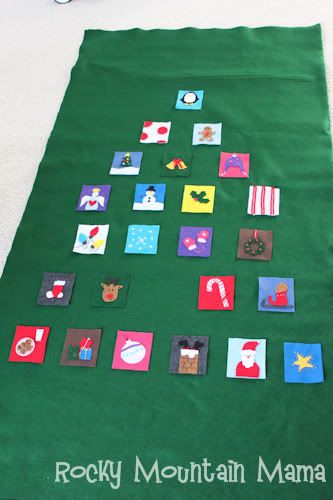
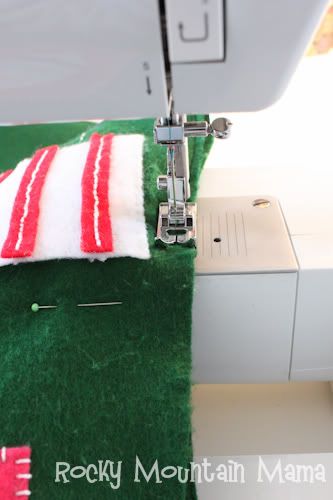
Step 8: Now it’s time for more stitching. Yay! Lay out your squares onto your green fabric. {Make sure each row is straight and divided equally.}
Pin your squares in place and then start stitching each square in place. I chose to use white thread for my entire tree. You could also match your thread to each pocket or to your tree color – totally up to you.

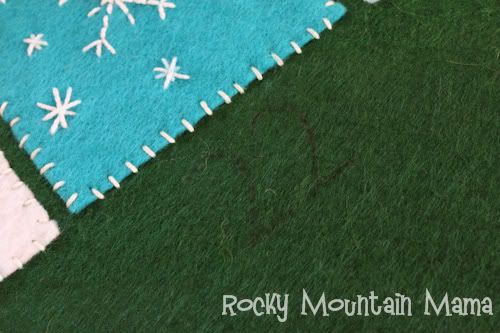
Step 9: Choose your favorite font and print numbers 1-25 from your computer. {You will want the numbers to be backwards, so when you iron them onto your tree, they will face the correct direction.} Trace the numbers using Iron-On Transfer Pencil.

Then iron on your numbers. {I could barely see the numbers after I ironed them on, so I went over it with a felt tip marker.}
Step 10: Now time for more stitching! I used white thread and a back stitch for my numbers.
Step 11: You’re almost finished! Now that you have your squares in place, trace out the shape of your tree and then cut along your line. Unfold your fabric and cut in half – now you have two trees!
Step 12: Cut two pieces of brown felt to make a tree stump. Layer your tree stump with batting. Bottom layer, batting, top layer. Pin it all together and sew them together.
Step 13: Now layer your tree just like you did your tree stump. Use matching thread to sew your pieces together. If you don’t have a sewing machine, you can also choose to hand stitch them together.
{I ended up not having perfectly straight edges when I was finished, so I took my scissors and trimmed around the edges of the tree.}
Step 13: Once you get to the bottom of the tree, sew in your tree stump.

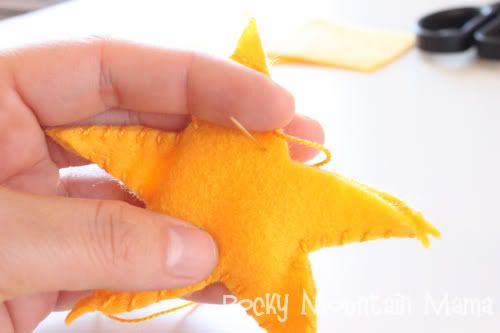
Step 14: Add a felt star on top! You could also hand stitched a few snow flakes in random places around my tree. If you wanted to get super fancy, you could hand stitch your last name at the bottom of the tree.
Step 14: Stitch a piece of ribbon on the back so that you have something to hang it from.

Cost Breakdown:
Green felt – about $3/yard = $9 total
Sheets of felt – 4/$1 = $5 total
Craft thread – about $15 for a variety pack {This was my most expensive material. I am pretty sure I used a 40% coupon for this.}
Fusible interfacing – $3
Fabric glue or Lite Steam-A-Seam2 – $3 or $4
Iron-on transfer pencil – $3.50
Batting – $4
Total Cost: about $40

Brought to you by: