
Allow me to introduce you to Kelly of Notable Nest. She is super creative and is the most amazing paper crafter I know. She’s here today to show us how to make a few pumpkin crafts, out of paper of course. Don’t forget to link up your Halloween crafts, recipes and decor HERE.
I am so honored to share my project with all of the other fantastic Halloween crafts at See Vanessa Craft. Today we’re going to make 3D honeycombs out of paper. Playing with paper is the best – it’s inexpensive, easy to work with, and holds a million possibilities. Although this article focuses on pumpkins, you could use this concept with any symmetrical shape. Think Christmas trees, ornaments, ghosts, you name it!
The materials you’ll need for these projects include:
- various papers
- scissors
- adhesive

To make the basic honeycomb shape, you’re going to:
- Fold lightweight paper in half and free hand draw half of your shape. Open it up and make sure you’re happy with it. This is your template.
- Place your template on top of several layers of cardstock. Cut out shapes. If you have a punch or diecut machine, you can simply punch or cut your shape and skip these two steps.
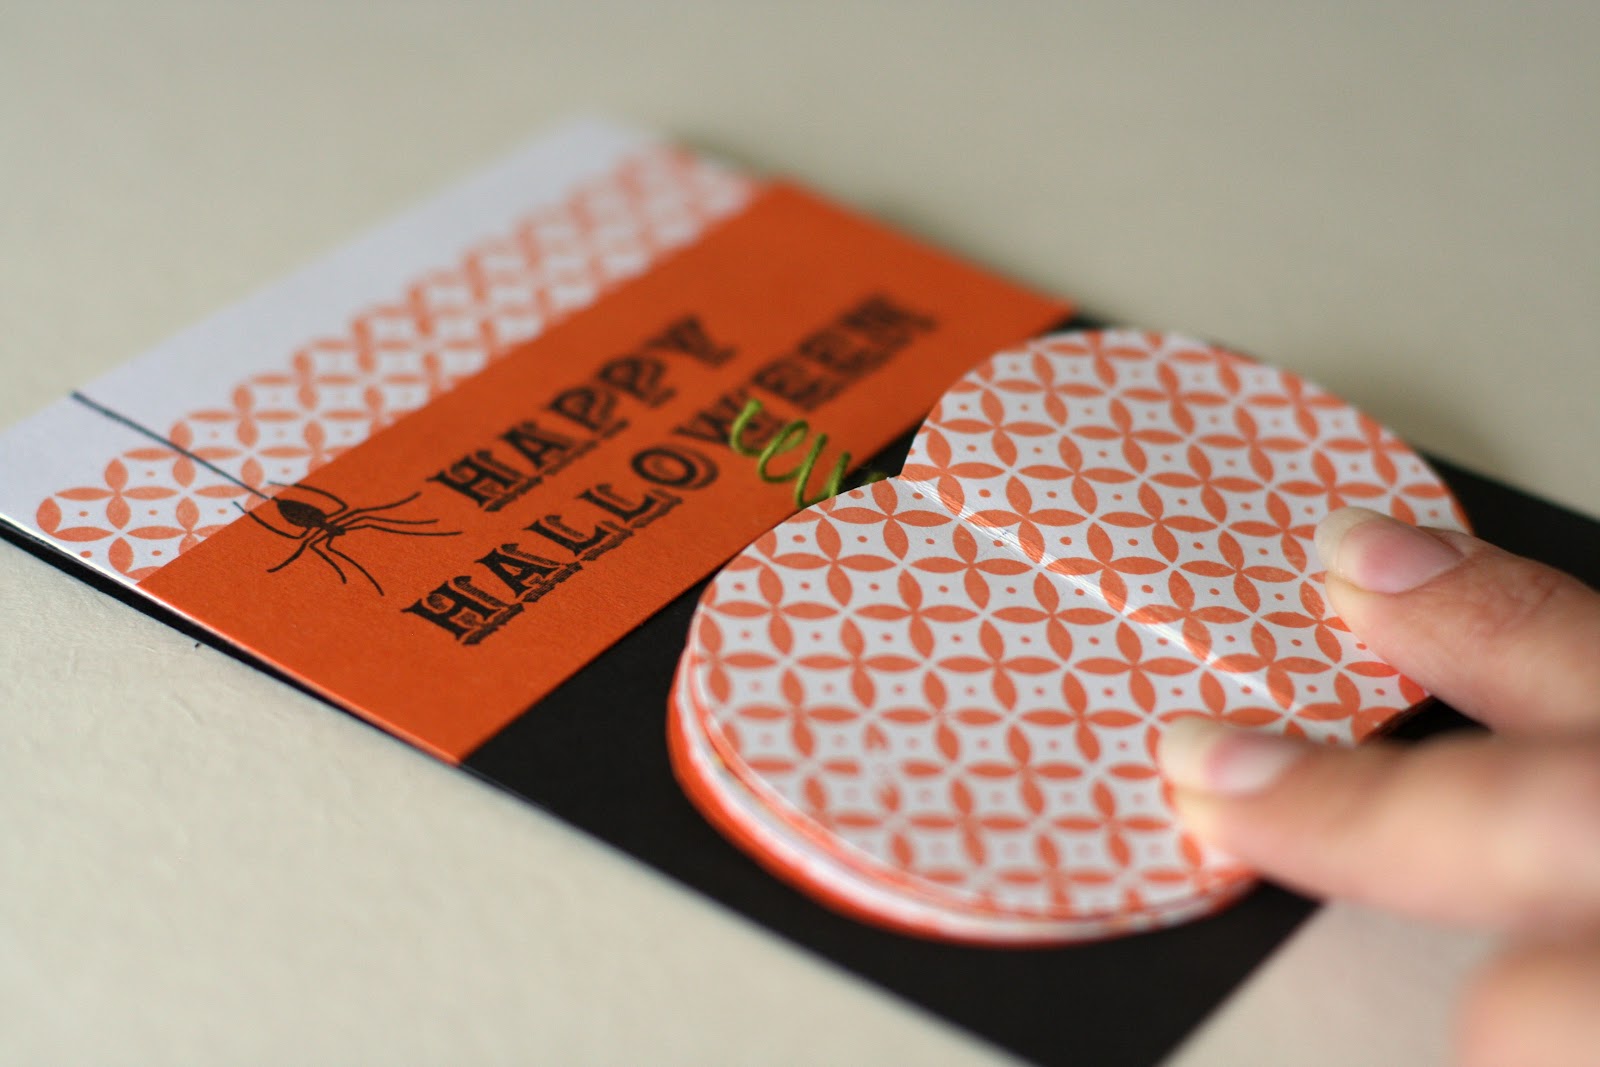
- Fold each shape in half.
- Place adhesive on one half of each folded shape. Stack up all the folded shapes, making sure they line up evenly along the fold.
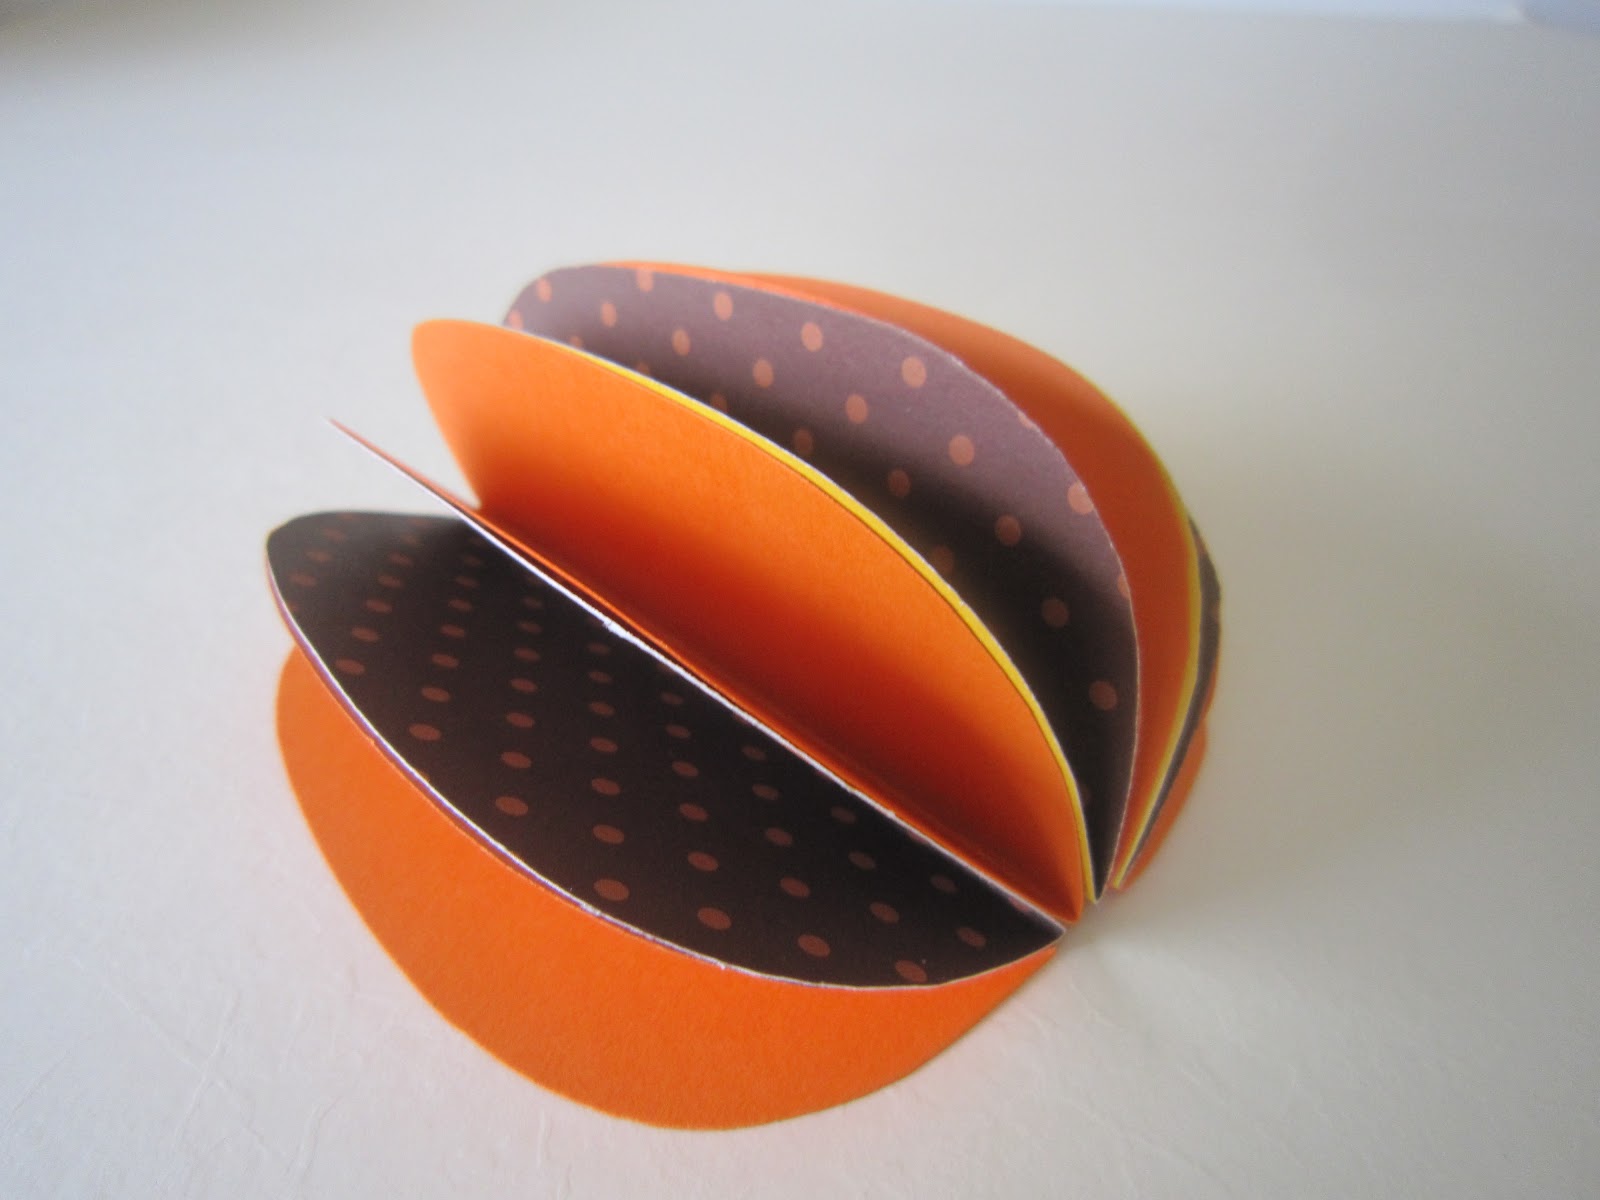
When it opens, your 3D honeycomb will appear. The number of shapes you need depends on the thickness of paper. This honeycomb uses heavy cardstock so I just used 7 shapes. Lighter paper like copy paper or newspaper will require more shapes.
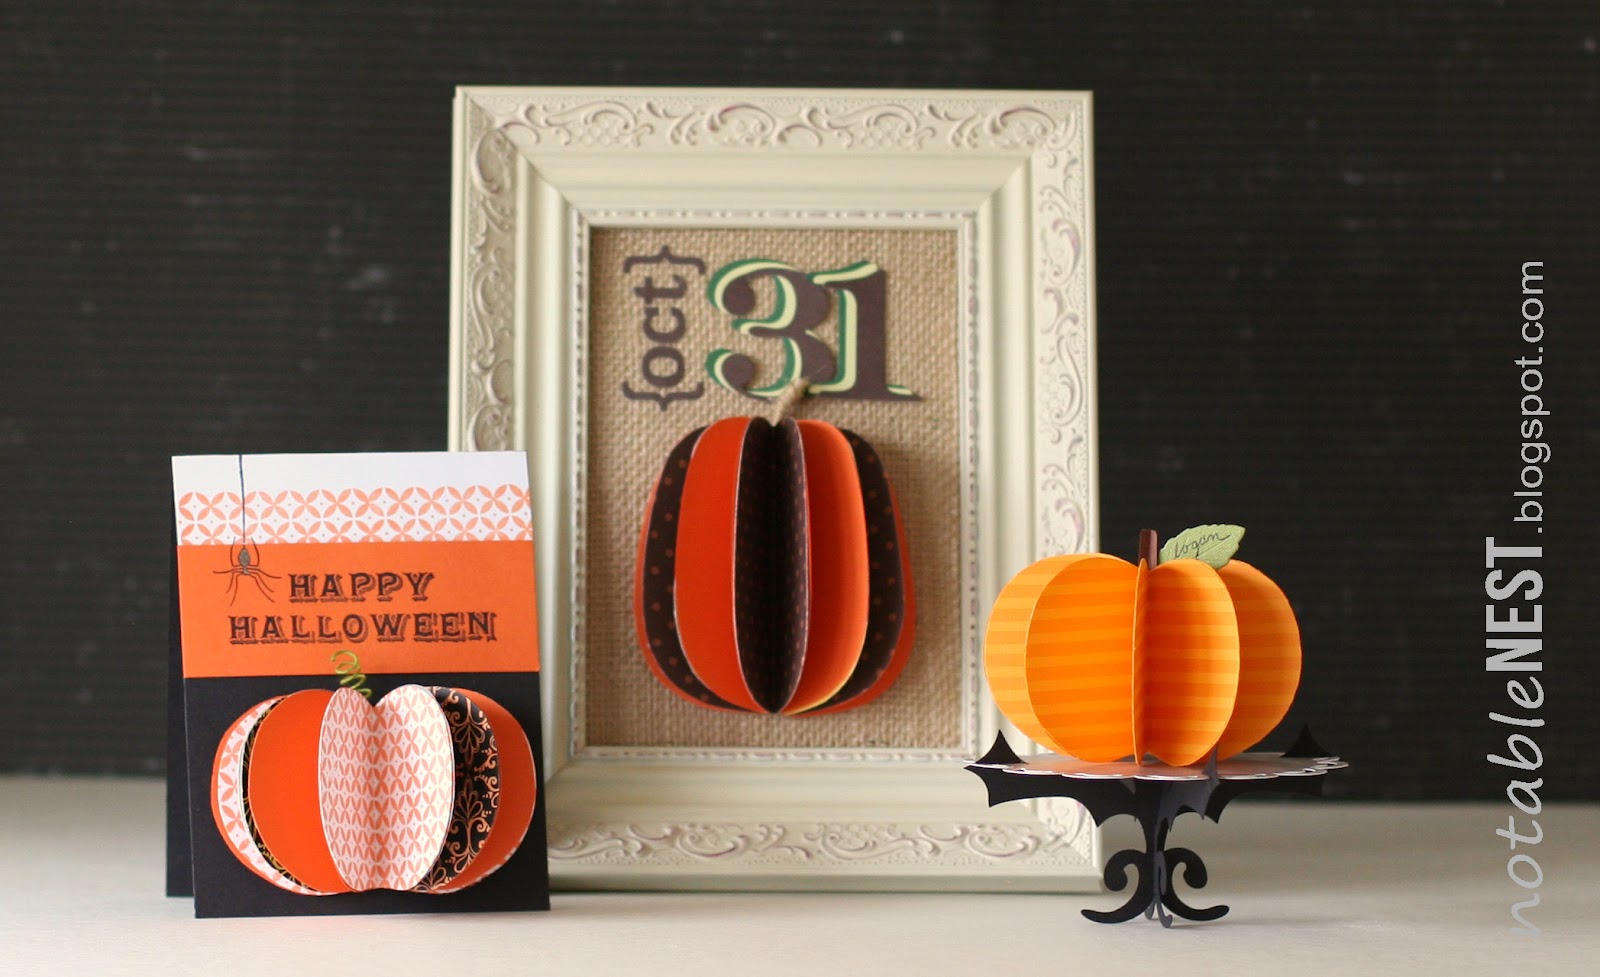
So, let’s see some completed projects!
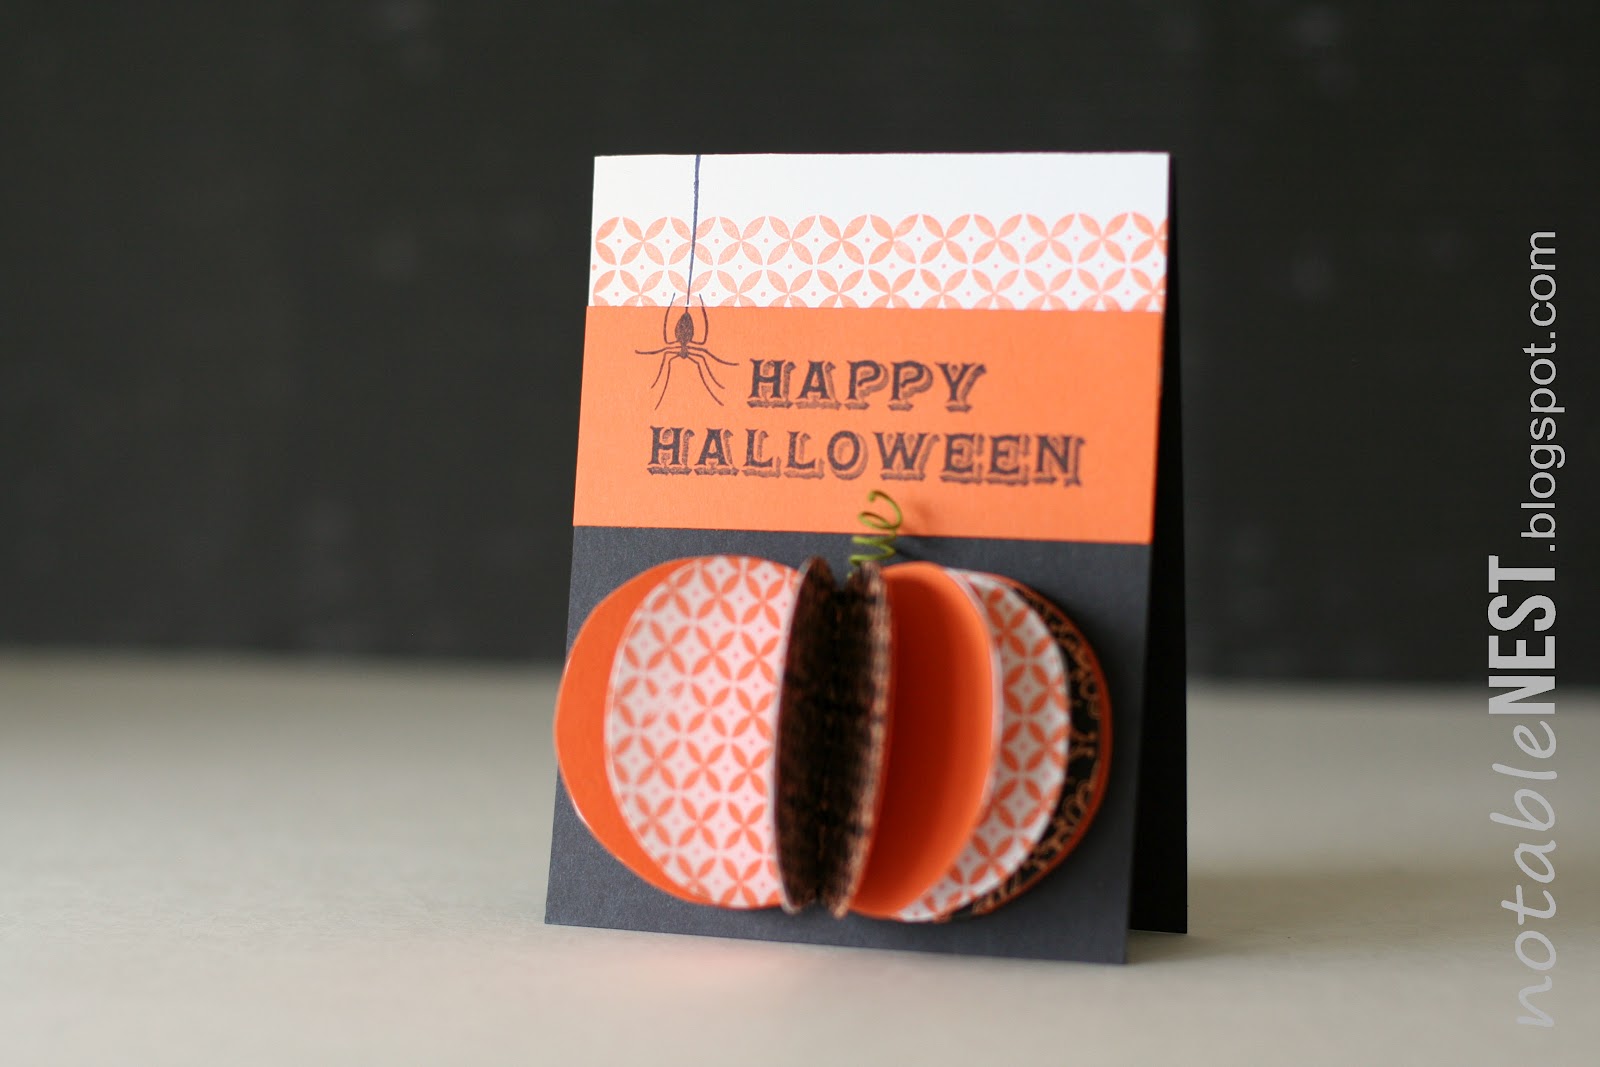
First up is a Halloween card. With a black cardstock base, add some strips of patterned paper, stamp a spider and your “Happy Halloween” sentiment, and attach the honeycomb pumpkin. I added a stem of curled floral wire. This pumpkin uses 3 different papers, but you could make it all one color for a more contemporary look, or have each shape be a different pattern for a more cottage-like style.
The beauty of this 3D honeycomb element is that it easily folds flat so you can mail it! When your recipient pulls the card out of the envelope it will pop back up.

Another idea is to make a quick and easy home decor item. Find an old frame around the house, remove the glass, cover the backing with burlap, and glue on your 3d honeycomb pumpkin. Above the pumpkin I’ve added a die cut title. You could also use letter/number stickers for the title, or skip a title and and just center the pumpkin.
Here’s a hint to get the right scale you want for your pumpkin: when making your template, start with a sheet of paper that’s the same size as your frame opening (see step 1 above). Then draw your shape accordingly.
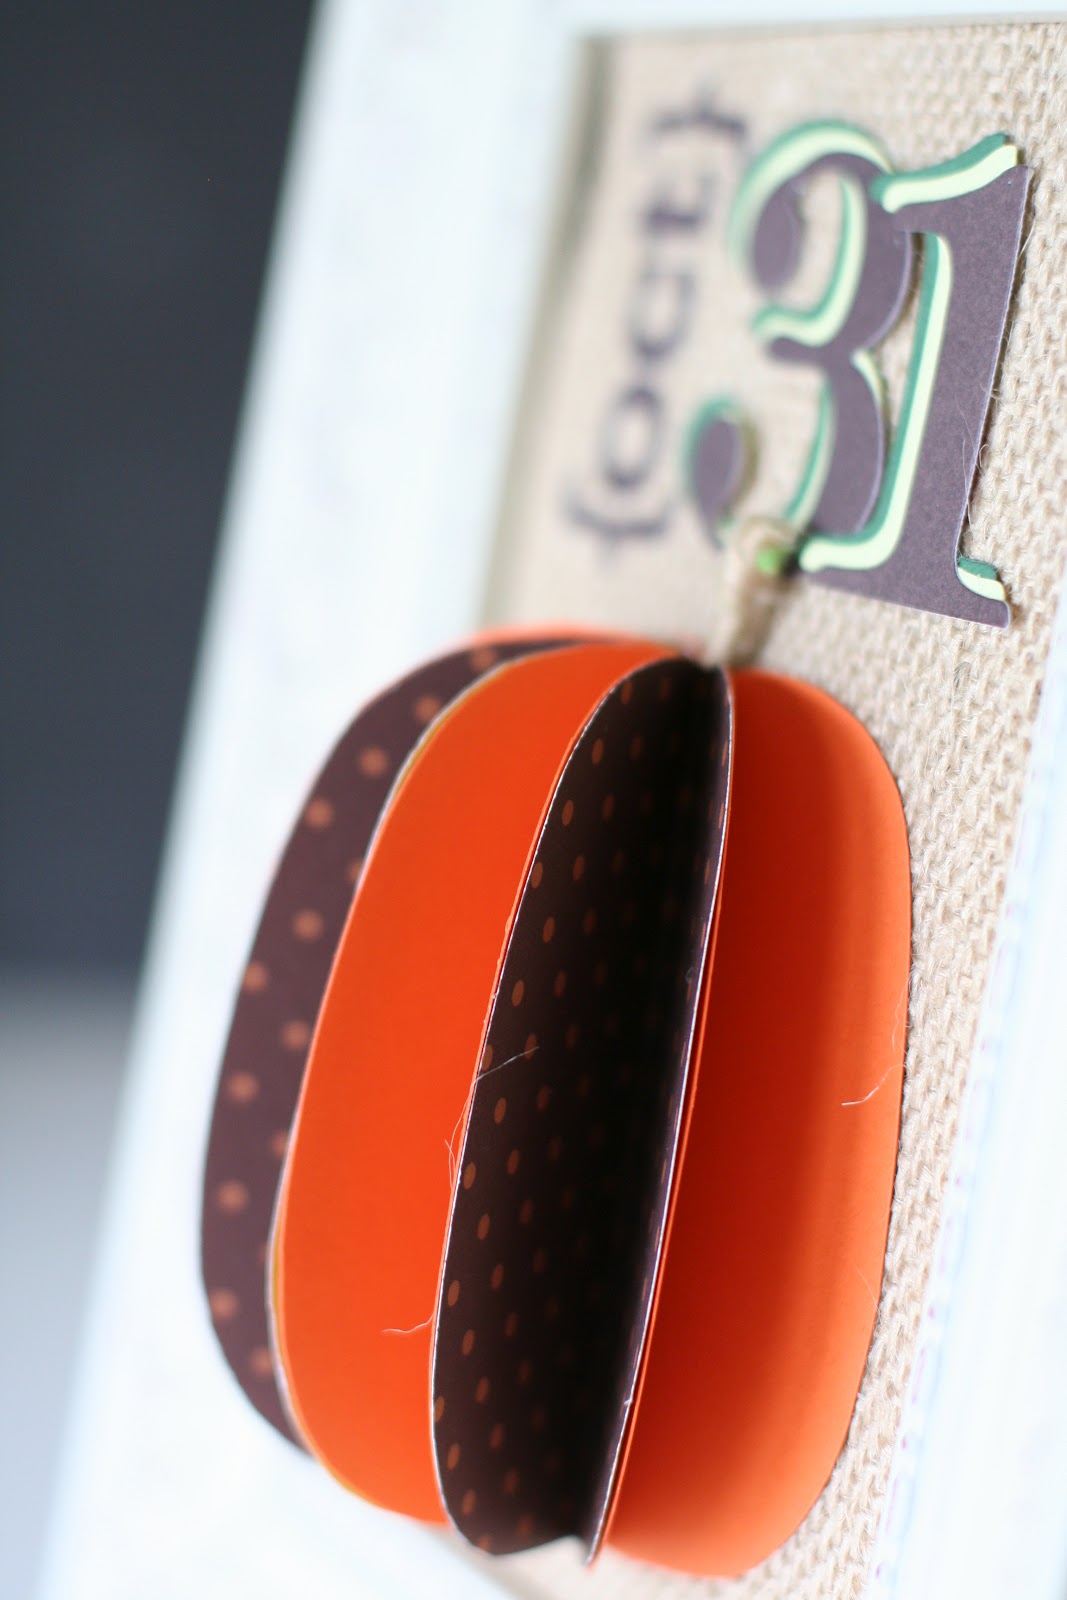
Framing your honeycomb pumpkin really shows off the neat 3D effect from across the room. This dimension is a perfect compliment among other flat frames in your house, or on your wall.

One more idea before I go. Cut out a few more shapes and let it pop all the way open. Adhere the last and first shape together. Now you have a free-standing honeycomb shape! I added a 3D stem out of brown cardstock, and a leaf shape. You can use this as-is to sit on a window ledge, fireplace mantle or among your Halloween decor.

How about parties? Write your party guests’ names on each leaf and use it as a charming place card at your dinner table. This doubles as a nice favor for your guests to take home and use in their decorations. What a great reminder of your special event! Pick the colors to match your party decor. Remember, these honeycombs can be used for ANY shape to fit in with your party theme.
I hope you’ve come away with an idea or two to use with these fun honeycomb shapes. Thanks so much for taking a look!

Hi, I’m Kelly! Crafting has always been a huge part of my life, encouraged in childhood by my Grandma who always had a project for me. I love to create custom parties, make home decor items, and more recently design cards. For other ideas from Notable Nest, check out my pirate party, shaped owl card, or growth chart. A special thanks to Vanessa for inviting me over!


10 Responses
Fabulous projects by Kelly!
LOVE Kelly’s tutorial! Congrats to Kelly on the guest design here! Uber COOL!
Adorable projects Kelly! Thanks so much for sharing your creative process with us!
These are SUPER cute! Thanks for the great ideas!!
So simple but so fun and pretty.
I love how they pop out of the picture frame! Great idea!
Those are way cute–I love the different patterns in there 🙂
I am a card maker and these are a definite go…
Thanks very much!
Cindi
Oh my word, those pumpkins are adorable!! And I love the fact that you hand cut the pieces:) Not that I don’t love my dies and digital cutter, but there’s something to be said for a hand-cut craft:) And I love the modern papers you chose! Wonderful Kelly!
So cute and such a fun idea! Love everything about it 🙂
Thanks for linking up at Artsy Corner!