
On the 9th day of Christmas…
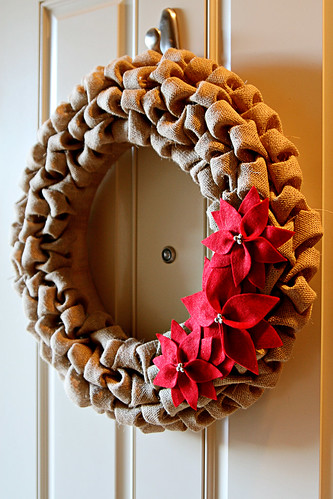
This wreath seriously tested my patience, but isn’t it gorgeous? I saw this baby (minus the poinsettia’s) on Etsy and had to recreate it. It wasn’t that it was difficult to make, it just took forever to do. It wouldn’t have taken that long if I just pinned it all together, but I decided to hot glue each little burlap bubble together to make it more permanent. Never. Again. I now have 3rd degree hot glue gun burns all over my fingers. Now that is the sign of a serious crafter for you. Go the pin route, your fingers will thank you.
Wreath Materials
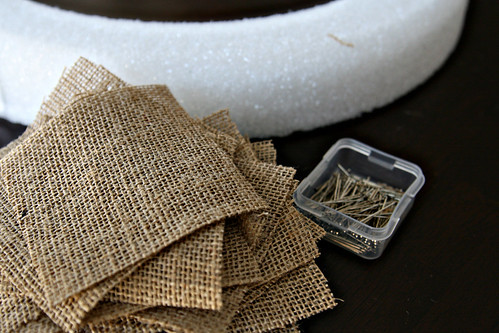
1.5 Yards of Burlap
Foam Wreath Form
Large Head Pins
Rotary Cutter & Mat or Scissors
Hot Glue (I warned you)
Soda Can Topper & Ribbon
Foam Wreath Form
Large Head Pins
Rotary Cutter & Mat or Scissors
Hot Glue (I warned you)
Soda Can Topper & Ribbon
Poinsettia Materials
2 – 8.5×11 Red Felt Sheets
Hot Glue
Scissors
Silver Stud Stickers or Beads
Directions
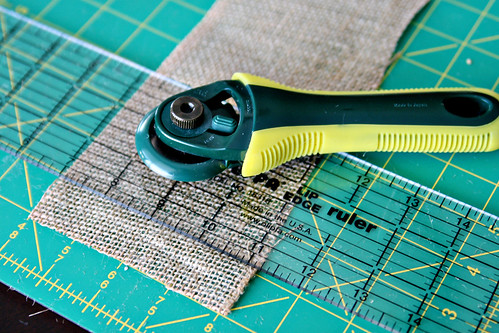
Step 1:Cut the burlap into 4×4 squares using a rotary cutter or scissors.
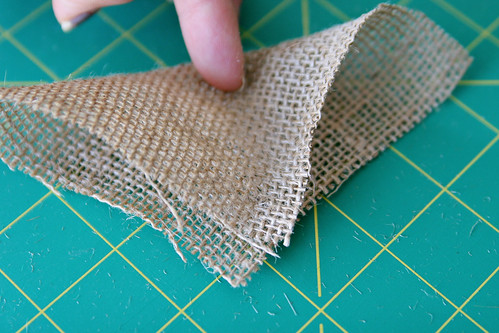
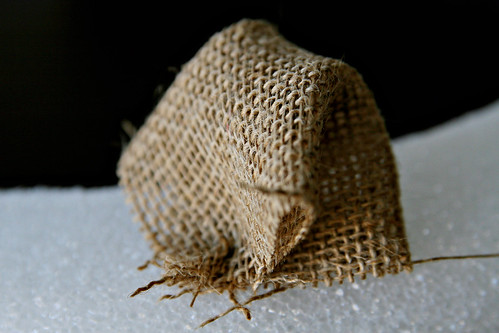
Step 2: Make a “bubble” out of a burlap square by folding the square in half so it forms a triangle. Bring the ends of the triangle in to meet the point, as shown in the picture, so all 4 points of the square are meeting.

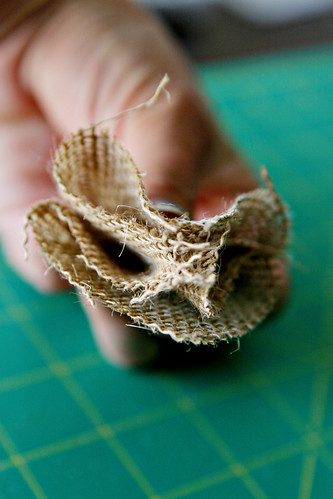
Step 3: You can add a dab of hot glue to where all 4 points meet, hold it for a few seconds (and get burned in the process) and then pin it to the wreath form. Or you can forgo the hot glue torture and stick a large head pin through all 4 points of the burlap bubble and pin it to the foam wreath.
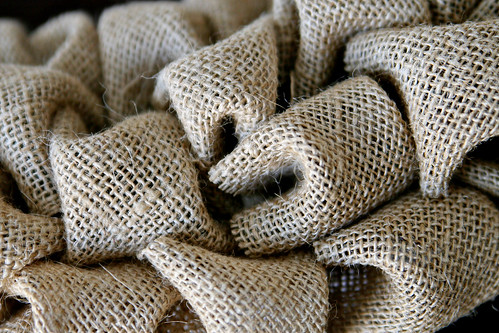
Step 4: Keep bubbling and pinning until the entire foam wreath is covered. I was able to cover my wreath form with 4 rows of burlap bubbles. As you go, arrange the burlap bubbles so they almost fold into each other. There is really no method to this madness, just randomly pin a bubble and determine if it looks good to you.

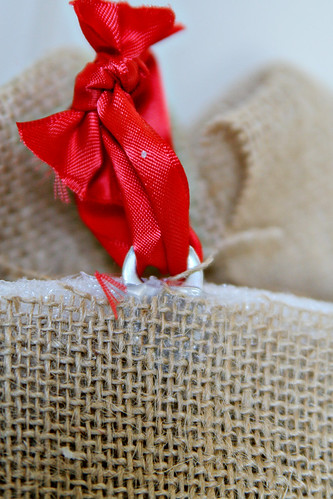
Step 5: Hot glue a soda can topper to the back of the wreath form and tie a piece of ribbon to it, this is how you will hang the wreath. I used a short piece of ribbon because I didn’t want it to be seen when hung. Hot glue the remaining burlap squares to the sides and back of the wreath form so no white is showing when you hang it.

Step 6:That’s all folks. Hang your wreath and admire. This baby can stay up year round, but if you want to add a bit of Christmas to it, keep reading.
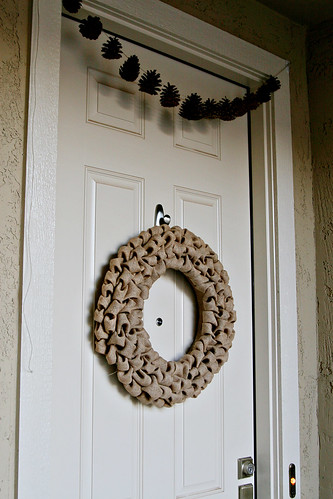

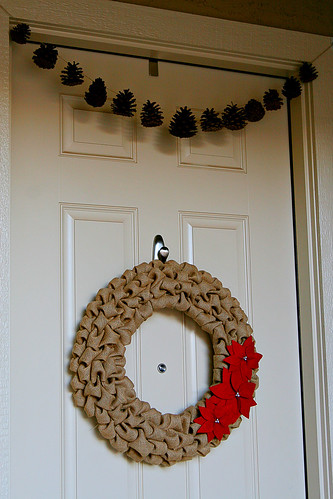
Step 7: Add felt poinsettias to your wreath. You can find a felt poinsettia template and tutorial on Better Homes & Gardens. Attach the poinsettias with glue dots or another removable adhesive, so you can use the wreath year-round. By the way, you can learn how to make the pine cone garland that I have in my pictures at Parent Society.


One Response
I did actually make one today, and I’m so plaesed! It’s so full and pretty. I didn’t have any cute flowers on hand so I just tied on a big bow using some sparkly pumpkin ribbon I’ve had for years. I love it so much I may wind up keeping it up all year long, changing out the add-ons to go with the seasons! Thanks for the great tutorial.