See Vanessa Craft

A Life Well Lived: Crafts, Recipes, Parties, Home, Travel

  • Email
  • Facebook
  • Google+
  • Instagram
  • Pinterest
  • Twitter
  • YouTube
  • Home
  • About Me
    • Contact
  • Recipes
    • breakfast
    • dessert
    • main dish
    • healthy recipes
  • Crafts & DIY
    • crafts
    • edible crafts
    • gift ideas
    • printables
    • diy
    • home decor
  • Parties
    • children’s parties
    • birthday parties
    • baby showers
  • Holidays
    • new year’s eve
    • valentine’s day
    • superbowl
    • st. patrick’s day
    • easter
    • cinco de mayo
    • mother’s day
    • teacher appreciation
    • 4th of july
    • halloween
    • thanksgiving
    • christmas
  • Travel
  • Disney
  • My Book
You are here: Home / tutorials / home decor / Craft | Chalk Cloth Labels

Craft | Chalk Cloth Labels

January 14, 2015 By Vanessa 1 Comment

chalk cloth labels with chalkboard title

by: Jennifer Dawn for See Vanessa Craft

This time of year always gets me in the mood to organize, and one of the easiest ways to neaten up a closet or cabinet is with baskets. These chalk cloth labels raise the cute factor even more while serving the practical purpose of reminding you of what’s inside. Do you have a few baskets or containers in your home that could use a label. Here’s how to make your own chalk cloth labels…

Materials:
chalk cloth (I get mine from RaspberryCreekFabric.)
pencil and paper
sewing machine
scrap fabric
basic sewing supplies (scissors, thread…)
chalk
hole punch
twine

Instructions:
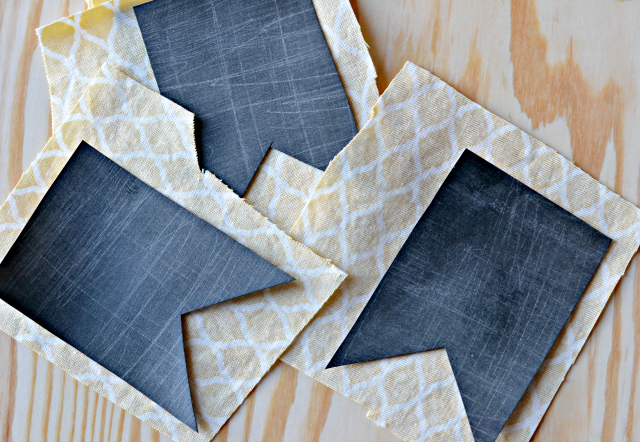
1. Gather your materials. Prime your chalk cloth by rubbing a piece of chalk over the surface in both directions and wiping the chalk away. This will prevent the first thing you write on your cloth from becoming a permanent image that doesn’t erase.

priming the chalk cloth

2. With your pencil and paper, draw out the shape you want your label to be. I made a pennant flag pattern. Use the paper pattern as a guide for cutting out pieces of chalk cloth.

cutting the chalk cloth

3. Cut out pieces of scrap fabric that are a little larger than each piece of chalk cloth. I don’t cut the patterned fabric in the same shape yet. When you are sewing two very different materials together like a heavy chalk cloth and a lighter cotton fabric, they will each stretch differently as you sew.

laying out the pieces

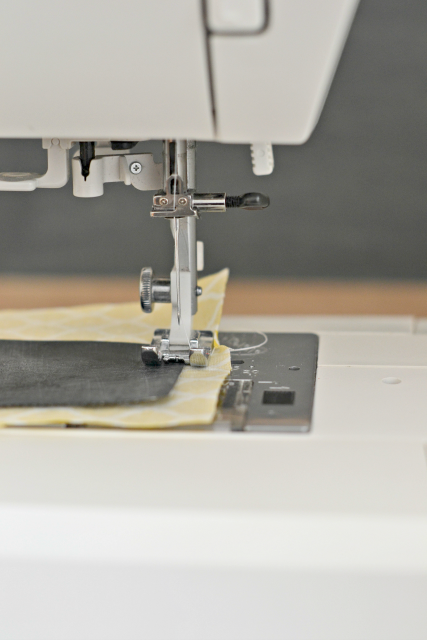
4. With the right side of each material facing out, stitch around the perimeter of the chalk cloth labels. Tip: Remember to backstitch (sew forward a few stitches, back a few stitches, and then forward again) at the start and finish.

sewing the labels

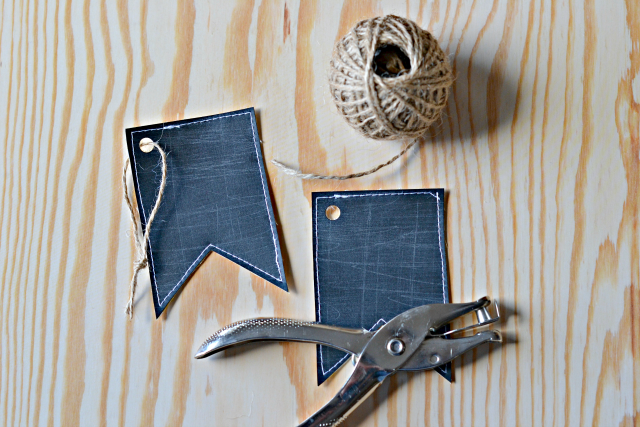
5. Trim the threads and the excess fabric from around each label.

before cutting around the labels

6. Use your punch to make a hole in the corner of each label. Tip: If needed, you can use scissors to neaten up the holes. Thread twine through each hole.

tying twine for the labels

7. Now you can write on your labels.

writing on the chalk labelsCollegeSavingsBank

8. And tie them onto a basket or other storage container.
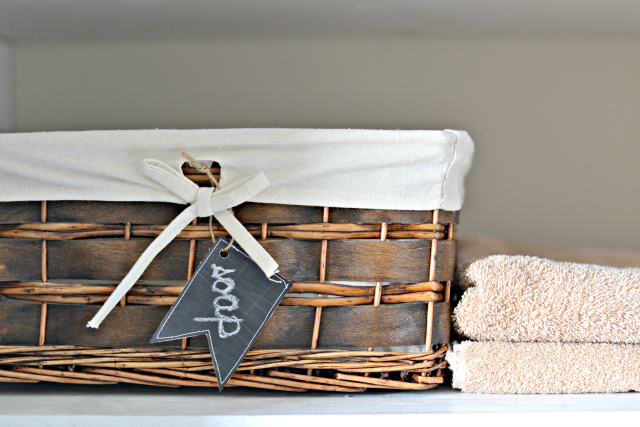
chalk label chalk cloth label on a basket

Happy organizing!

Jennifer is a wife, mommy, and former teacher who left the classroom to stay home with her three little ones. She’s an avid crafter who loves to dapple in all things creative. Through blogging she’s found a way to share her love of craftiness and spread a little happiness. She blogs at The Life of Jennifer Dawn.

You Might Also Like

  • (craft tutorial) spring fabric garland (craft tutorial) spring fabric garland
  • (craft spaces) organizing a small craft cabinet(craft spaces) organizing a small craft cabinet
  • Craft: New Job Gift in a Chalkboard JarCraft: New Job Gift in a Chalkboard Jar
  • (do something crafty challenge) blogger #2 jennifer(do something crafty challenge) blogger #2 jennifer
The following two tabs change content below.
  • Bio
  • Latest Posts
My Twitter profileMy Facebook profileMy Google+ profileMy Instagram profileMy Pinterest profileMy YouTube channel

Vanessa

I'm Vanessa and it's my mission in life to spread my love of hot glue guns and glitter to others. I suffer from craft ADHD, regularly working on at least 10 projects at the same time and my craft room looks like a tornado hit it. My first craft book, Party in a Jar, was published in 2014. I look forward to crafting with you!
My Twitter profileMy Facebook profileMy Google+ profileMy Instagram profileMy Pinterest profileMy YouTube channel

Latest posts by Vanessa (see all)

  • Turkey and Cheddar Sandwich Kabobs - January 8, 2021
  • Circus Animal Cookie Valentine Tags - January 7, 2021
  • Orange Themed Holiday Gift Idea - December 16, 2020
  • Christmas Blanket Gift Idea with Printable Tags - December 9, 2020

Filed Under: home decor, tutorials Tagged With: Chalkboard, Jennifer Dawn, Organization, sewing

Never Miss A Post!

« Recipe | Crock Pot Chicken Noodle Soup
Craft | Rosemary Heart Garland »

Comments

  1. Katie Harding says

    January 15, 2015 at 9:02 am

    I am all about organization in my house, especially with three little boys so I am totally digging this idea!
    Katie Harding recently posted..Game Time Recipes – with a Kick!My Profile

    Reply

Leave a Reply Cancel reply

Your email address will not be published. Required fields are marked *

CommentLuv badgeShow more posts

This site uses Akismet to reduce spam. Learn how your comment data is processed.

Never Miss A Post!

(diy tutorial) wee little pot of gold cake pops

(diy tutorial) wee little pot of gold cake pops

Recipe: Green Tea Meringues

Recipe: Green Tea Meringues

Printable: Car Valentine Bag Topper

Printable: Car Valentine Bag Topper

Circus Animal Cookie Valentine Tags

Circus Animal Cookie Valentine Tags

Instagram

Load More...
Follow on Instagram

Find It Here

Archives

Categories

Contact Me

Have a question or just want to say hello? I'd love to hear from you! Send me an email at seevanessacraft@gmail.com
Privacy

Copyright © 2021 · Tasteful theme by Restored 316

Copyright © 2021 See Vanessa Craft · Log in

»
«