See Vanessa Craft

A Life Well Lived: Crafts, Recipes, Parties, Home, Travel

  • Email
  • Facebook
  • Google+
  • Instagram
  • Pinterest
  • Twitter
  • YouTube
  • Home
  • About Me
    • Contact
  • Recipes
    • breakfast
    • dessert
    • main dish
    • healthy recipes
  • Crafts & DIY
    • crafts
    • edible crafts
    • gift ideas
    • printables
    • diy
    • home decor
  • Parties
    • children’s parties
    • birthday parties
    • baby showers
  • Holidays
    • new year’s eve
    • valentine’s day
    • superbowl
    • st. patrick’s day
    • easter
    • cinco de mayo
    • mother’s day
    • teacher appreciation
    • 4th of july
    • halloween
    • thanksgiving
    • christmas
  • Travel
  • Disney
  • My Book
You are here: Home / holidays / Craft: Cricut Adhesive Foil Teaching Is My Jam Shirt & Tumbler

Craft: Cricut Adhesive Foil Teaching Is My Jam Shirt & Tumbler

April 26, 2017 By Vanessa Leave a Comment

Teaching Is My Jam Teacher Gift

I have a new craft obsession: ADHESIVE FOIL! It’s the best invention ever and so much fun to craft with. A foil applause shirt is on my to do list. With Teacher Appreciation Week coming up, I plugged in my Cricut and created a “Teaching Is My Jam” shirt and tumbler for my son’s kindergarten teacher. Teaching is definitely her jam, she’s amazing! If I have time, I’ll make a matching tote bag with the same metallic rose gold foil. If you know a kindergarten teacher, go hug them. I’ve volunteered in my son’s class and always return home completely exhausted. There’s a special place in heaven for kinder teachers and they deserve all the adhesive foil shirts and tumblers in the world! In addition to foil, the cricut can also cut vinyl, paper, washi tape, craft foam, glitter paper, aluminum, burlap, leather and so much more. Also go hug your Cricut while you are at it! 

SUPPLIES

Cricut Machine
Cricut Adhesive Foil
Cricut Iron On Foil
Cricut Cutting Mat
Shirt
Tumbler
Cricut Transfer Tape
Iron or Heat Press
Cricut Essential Tool Set

INSTRUCTIONS

Step 1: Grab your supplies online at Cricut.com, click on “shop”. You’ll need adhesive foil for the tumbler and iron on foil for the shirt. I went with metallic rose gold for both, but you can’t go wrong with any of the color options! Grab the Cricut Essential Tools, I don’t know what I ever did without this kit! It’ll make your life so much easier. 

Teaching Is My Jam Gift 1 copyTeaching Is My Jam Gift 2 copy

Step 2: Cut your vinyl to fit on your cutting mat. Attach the vinyl to the mat, I used a 12×12 standard grip mat. Iron on vinyl goes metallic side down. Adhesive vinyl goes metallic side up. 

Teaching Is My Jam Gift 3 copy

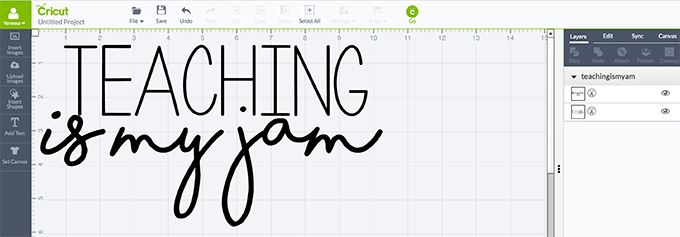
Step 3: You can create your own “Teaching is my Jam” image in Cricut Design Studio or use an image from the Cricut library. I purchased this specific svg image from MyLittleArrows Etsy Shop and uploaded it into Cricut Design Studio. Measure your shirt and cup, so you know how large you’ll need to cut. For a medium shirt, I cut the image at 10 inches wide. For an average tumbler, I cut the image at 4 inches wide. Make sure to adjust your cut settings on your machine for “foil”. Cut your images with your cricut! 

Screen Shot 2017-04-25 at 1.28.51 PM Teaching Is My Jam Gift 4 copy

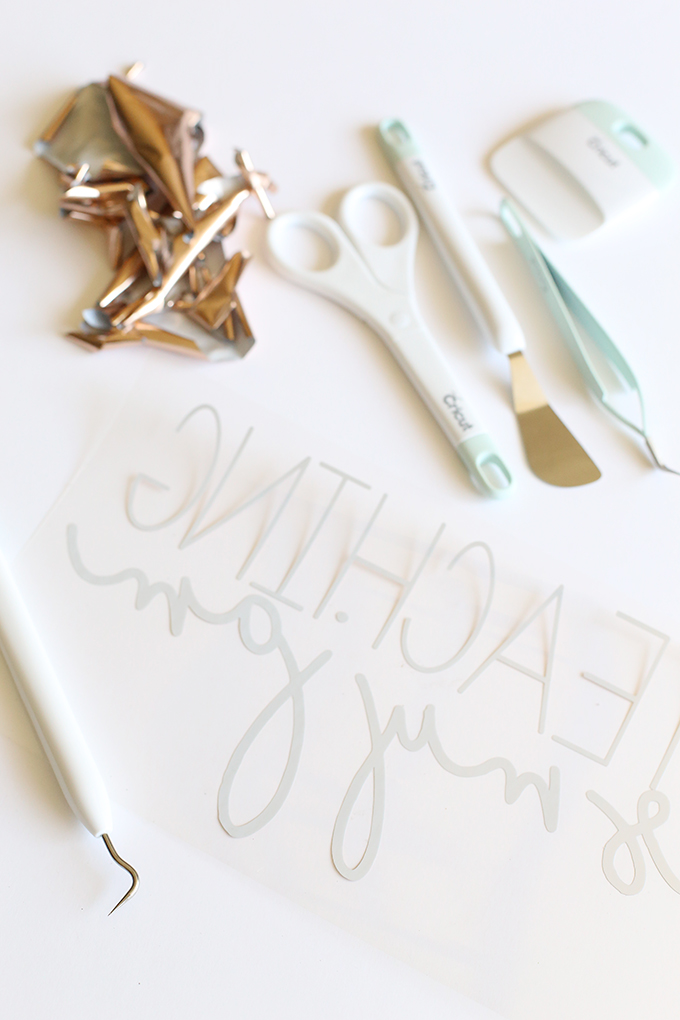
Step 4: Use the Cricut Essential Tools to weed your iron on foil image. You’ll be removing anything that you don’t want on your shirt. 

Teaching Is My Jam Gift 5 copy

Step 5: Place the iron on foil image onto the shirt, making sure that it’s straight. Use a heat press or iron to apply the foil to the shirt. Read the foil instructions for iron/heat press settings. 

Teaching Is My Jam Gift 6 copy Teaching Is My Jam Gift 10 copy

Step 6: Weed the adhesive vinyl on image, removing anything that you don’t want on the tumbler.

Teaching Is My Jam Gift 7 copy

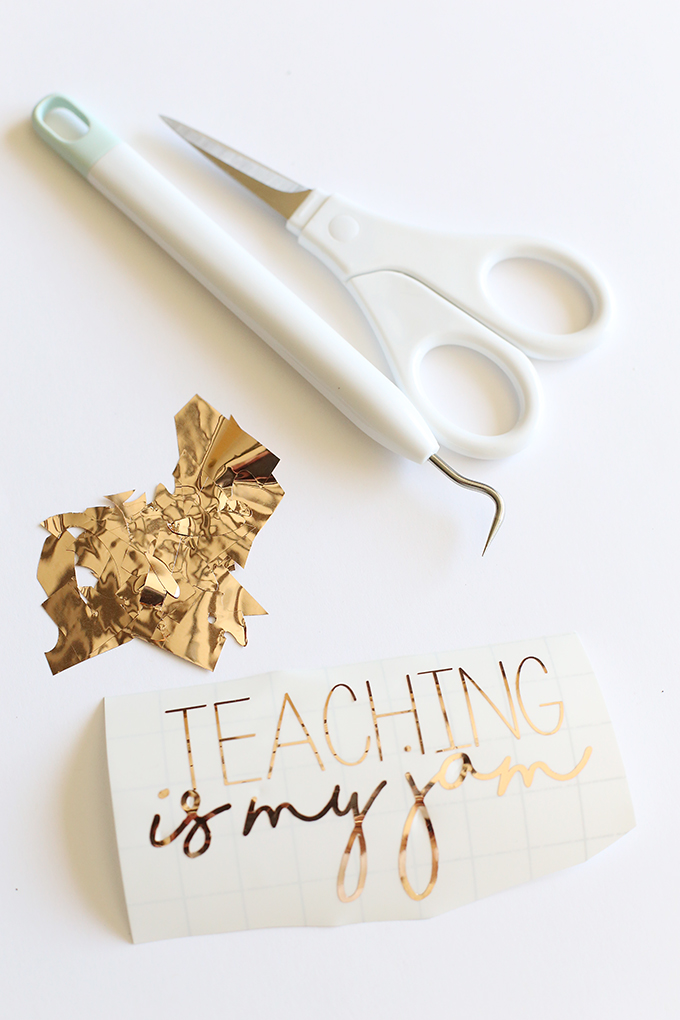
Step 7: Place a piece of Cricut Transfer Tape on top of the adhesive foil, rubbing so the image transfers to the tape.

Teaching Is My Jam Gift 8 copy

Step 8: Place the transfer tape with the foil on the tumbler and rub so the foil transfers to the tumbler. Slowly peel away the transfer tape.

Teaching Is My Jam Gift 9 copy

Step 9: Package in a gable box, tie a bow on top and gift to your favorite teacher!

Teaching Is My Jam Gift 11 copy Teaching Is My Jam Gift 12 copy

Visit Cricut.com for more Teacher Appreciation Week inspiration! How will you say thank you?

This is a sponsored conversation written by me on behalf of Cricut. The opinions and text are all mine.


You Might Also Like

  • Craft: Cleaning Bucket Housewarming GiftCraft: Cleaning Bucket Housewarming Gift
  • Organization: Small Pantry MakeoverOrganization: Small Pantry Makeover
  • Craft: Glitter Vinyl Hiking ShirtCraft: Glitter Vinyl Hiking Shirt
  • Party: Baby Shower Onesie Iron OnsParty: Baby Shower Onesie Iron Ons
The following two tabs change content below.
  • Bio
  • Latest Posts
My Twitter profileMy Facebook profileMy Google+ profileMy Instagram profileMy Pinterest profileMy YouTube channel

Vanessa

I'm Vanessa and it's my mission in life to spread my love of hot glue guns and glitter to others. I suffer from craft ADHD, regularly working on at least 10 projects at the same time and my craft room looks like a tornado hit it. My first craft book, Party in a Jar, was published in 2014. I look forward to crafting with you!
My Twitter profileMy Facebook profileMy Google+ profileMy Instagram profileMy Pinterest profileMy YouTube channel

Latest posts by Vanessa (see all)

  • Free Printable Yoda Best Valentine Tags - January 29, 2021
  • Turkey and Cheddar Sandwich Kabobs - January 8, 2021
  • Circus Animal Cookie Valentine Tags - January 7, 2021
  • Orange Themed Holiday Gift Idea - December 16, 2020

Filed Under: crafts, gift ideas, holidays, teacher appreciation, tutorials, wearable Tagged With: adhesive foil, Craft, Cricut, gift, teacher appreciation, tumbler

Never Miss A Post!

« DIY Lavender Sugar Scrub Recipe
Disney: Pixar Animation Studios Tour #Cars3Event »

Leave a Reply Cancel reply

Your email address will not be published. Required fields are marked *

CommentLuv badgeShow more posts

This site uses Akismet to reduce spam. Learn how your comment data is processed.

Never Miss A Post!

(diy tutorial) lucky chocolate covered oreos + free printable

(diy tutorial) lucky chocolate covered oreos + free printable

5 family fun night ideas and velata fondue giveaway

5 family fun night ideas and velata fondue giveaway

Craft | Rosemary Heart Garland

Craft | Rosemary Heart Garland

Party: DIY Valentine’s Day Photo Booth

Party: DIY Valentine’s Day Photo Booth

Instagram

Load More...
Follow on Instagram

Find It Here

Archives

Categories

Contact Me

Have a question or just want to say hello? I'd love to hear from you! Send me an email at seevanessacraft@gmail.com
Privacy

Copyright © 2021 · Tasteful theme by Restored 316

Copyright © 2021 See Vanessa Craft ยท Log in

»
«