I’m excited to have Jessica, the other half of Pretty Providence, guest blogging for me today. If you haven’t visited Pretty Providence yet, I highly recommend it. It’s packed with yummy recipes and great budgeting tips. Jessica is here to show us how to make a cute fabric scrap headband for under 4 bucks!
Hey guys! I’m Jessica, I blog over at Pretty Providence and I love it. I am a stay at home mom to the cutest boy around, wife to one amazing husband, crafter, reader, ameture cook, and I still spill on my t-shirts regularly..sigh. I am totally stoked to be a guest here on See Vanessa Craft (isn’t Vanessa awesome?), and share my latest easy, cheap DIY project with you! Without further ado…
The project I am going to share today is SO easy. I made six headbands for under $4.00. True story.
Materials
fabric scraps
cheap headbands
scissors
hot glue
needle & thread
Directions
Step 1: The first thing you will do is cut your fabric into long, thin strips. Mine were about one inch wide, and I just guessed on the length. Even if you don’t have fabric scraps, you can buy fabric scraps at Walmart for under $1.00, so the project is still dirt cheap!

The headbands I bought were little girl headbands in a pack of six at Walmart. Here is how this whole project started, I like headbands, but I hate wearing them because they always give me a massive headache after an hour! Somehow I discovered that the little girl ones don’t do this. They come up a little higher than most headbands do (not right over your temples) because my head is bigger than a little kid, and they aren’t as tight, I love them! The problem is, they always come in bright, cheesy colors.
Enter fabric scraps.
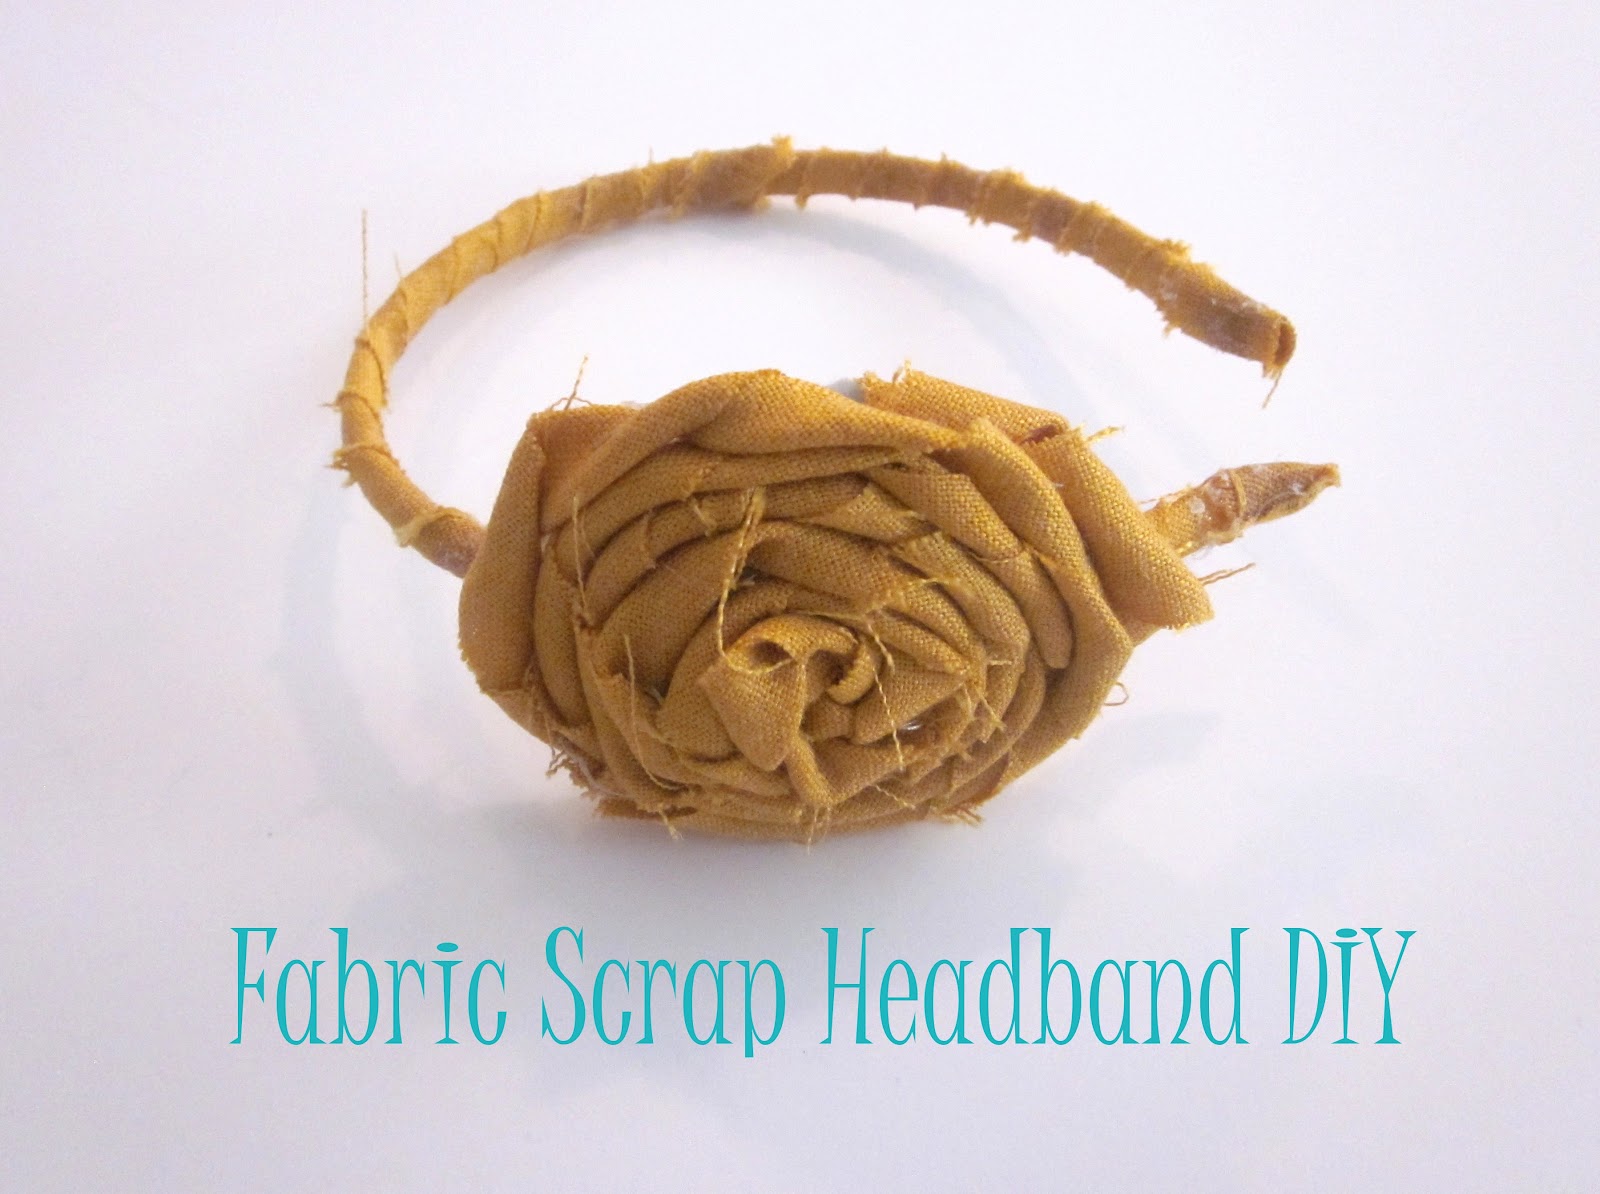
Step 2: Next, you just start gluing and wrapping your headband. All it takes is a very light line of hot glue down the middle of your scrap. The end is a tiny bit tricky, but just fold and wrap until you’re all covered.


I left some of my headbands plain (without flower) for days when I want to be a little more casual or unobtrusive.

Step 4: If you’d like to add the flower on yours, first, create your flower. For detailed instructions on how to do the one pictured, see this post. Basically, you cut another long fabric scrap about an inch wide. Then, turn your fabric around itself tacking into place with your needle and thread to secure until you reach desired size.
Step 5: After your headband is wrapped and your flower is made, cut out a little circle (of felt or fabric) just smaller than your flower. Place the flower on one side of the headband and your circle on the other and hot glue into place!

Oh, and did I mention this whole thing will take you less than 1/2 hour? My kinda craft! If you love eating well, crafting and playing on a budget, come check out Pretty Providence, or follow us on Facebook or Pinterest!


4 Responses
I love this!!
Thanks Jessica (and Vanessa!)
No problem! I’m so glad you like it!
Yay, thanks for having me Vanessa! You’re the best.
I love this way to use up fabric scraps that are too thin to sew with! Thanks for the creative idea!