See Vanessa Craft

A Life Well Lived: Crafts, Recipes, Parties, Home, Travel

  • Email
  • Facebook
  • Google+
  • Instagram
  • Pinterest
  • Twitter
  • YouTube
  • Home
  • About Me
    • Contact
  • Recipes
    • breakfast
    • dessert
    • main dish
    • healthy recipes
  • Crafts & DIY
    • crafts
    • edible crafts
    • gift ideas
    • printables
    • diy
    • home decor
  • Parties
    • children’s parties
    • birthday parties
    • baby showers
  • Holidays
    • new year’s eve
    • valentine’s day
    • superbowl
    • st. patrick’s day
    • easter
    • cinco de mayo
    • mother’s day
    • teacher appreciation
    • 4th of july
    • halloween
    • thanksgiving
    • christmas
  • Travel
  • Disney
  • My Book
You are here: Home / tutorials / diy / DIY: Reclaimed Wood Utensil Caddy

DIY: Reclaimed Wood Utensil Caddy

June 3, 2015 By Shelly Leave a Comment

utensil caddy title

Hello, See Vanessa Craft friends! It’s Shelly from Dolen Diaries where I share my love of all things creative and creating with the ones I love. Today, I’m sharing with you one of my favorite projects a DIY Utensil Caddy. As in the perfect beginner DIY project! All of the tools used are from the Beginner’s DIY Tool Guide List I shared here last month.

Supplies:

  • 2  dog eared fencing boards 6′ {we found ours next to a dumpster with all of this chippy paint goodness}
  • galvanized roofing nails
  • cordless drill
  • 1 1/2″ drill bit
  • cordless saw
  • hammer
  • framer’s square
  • tape measure
  • pencil

cuts

Cuts:

  • 2 – 7.5″ {ends dog eared}
  • 1- 18″ piece {bottom}
  • 2 – 16.5″ {sides} cut down or ripped down to 3.5″ wide.

mark for cutting handle holes

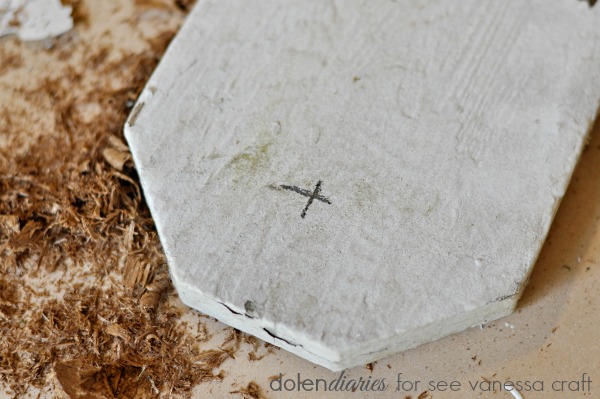
Mark where you want to drill your handle holes in the dog eared ends. 

hole handle

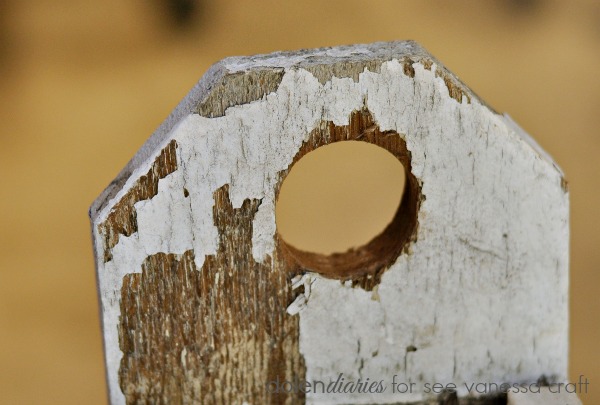
Drill your handle holes. 

set up sides and lay bottom on top

Set up the two 16.5″ sides and place the bottom on top of the sides.

galvanized nails through the bottom of the utensil caddy

Nail through the bottom to attach the sides. 

attach ends to trough caddy

Flip the box up on it’s end, sliding a handle under the bottom and one on top. Attach both ends to the sides with nails.

nail in bottom of shabby chic table caddy

Once both ends are attached flip the whole trough over and secure each end to the bottom. 

shabby chic trough

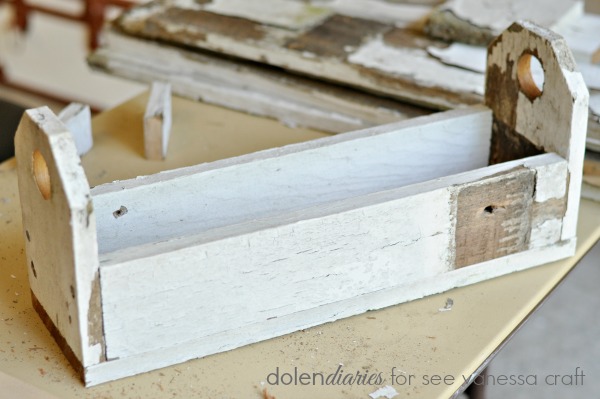
 Now you have the option to leave this as a simple trough. Aren’t you just dying!?! Oh I love reclaimed wood!! Now to make this into a utensil caddy….

nail in trough caddy dividers

Pop in the dividers and attach them with nails through the sides.

farmhouse table trough caddie

 Wouldn’t you love this utensil caddy on your table!?!

Reclaimed Wood Utensil Caddy Collage

I painted a couple of smaller mason jars with white chalk paint and scuffed them up a bit to hold forks and knives. There is plenty of space in between the jars for napkins. I used some old bottles with a few roses from my garden because who doesn’t love having flowers on a table!?! This DIY Utensil Caddy adds just the perfect touch of country chic to outdoor entertaining! Please pop on over to Dolen Diaries to check out all of my other DIY projects & crafts! 

You might also like:

Mason Jar Pump 1 copy 2Art Gallery DIY 2 web

 DIY Mason Jar Soap Pump

Child Art Gallery Wall

You Might Also Like

  • {DIY Tutorial} Acorn Squash Baby Food{DIY Tutorial} Acorn Squash Baby Food
  • (recipe) chocolate chip banana nut bread(recipe) chocolate chip banana nut bread
  • DIY: Water Spigot Towel HookDIY: Water Spigot Towel Hook
  • (diy tutorial) felt rose topiaries (diy tutorial) felt rose topiaries
The following two tabs change content below.
  • Bio
  • Latest Posts
My Twitter profileMy Facebook profileMy Google+ profileMy Instagram profileMy Pinterest profile

Shelly

Hi, I’m Shelly and I blog over at Dolen Diaries where I share a little this and that….DIY & craft projects, kids crafts & activities, and life as a mama to three fabulous boys. I love all things creative and am blessed to have a husband who loves to be creative with me! In fact, most of our date nights are spent in our garage working on our latest projects. I can’t wait to share all of my creative adventures with you!
My Twitter profileMy Facebook profileMy Google+ profileMy Instagram profileMy Pinterest profile

Latest posts by Shelly (see all)

  • DIY: Rustic Bulletin Board Frame Makeover - November 4, 2015
  • DIY Vintage Door Headboard - August 11, 2015
  • DIY: Water Spigot Towel Hook - July 14, 2015
  • DIY: Reclaimed Wood Utensil Caddy - June 3, 2015

Filed Under: diy, home decor, spring, summer, tutorials Tagged With: DIY, DIY Tutorials

Never Miss A Post!

« Kid Friendly: 5 Perfect Playdate Tips
Recipe: Easy Pulled Pork Sandwiches »

Leave a Reply Cancel reply

Your email address will not be published. Required fields are marked *

CommentLuv badgeShow more posts

This site uses Akismet to reduce spam. Learn how your comment data is processed.

Never Miss A Post!

5 family fun night ideas and velata fondue giveaway

5 family fun night ideas and velata fondue giveaway

(diy tutorial) lucky chocolate covered oreos + free printable

(diy tutorial) lucky chocolate covered oreos + free printable

Recipe: Valentine’s Day Crispy Treats

Recipe: Valentine’s Day Crispy Treats

Craft | Rosemary Heart Garland

Craft | Rosemary Heart Garland

Instagram

Load More...
Follow on Instagram

Find It Here

Archives

Categories

Contact Me

Have a question or just want to say hello? I'd love to hear from you! Send me an email at seevanessacraft@gmail.com
Privacy

Copyright © 2021 · Tasteful theme by Restored 316

Copyright © 2021 See Vanessa Craft · Log in

»
«