Hello everyone! I am Lory from The Robin’s Nest Designs. I blog about crafts, home, diy and whatever else we happen to be working on. My husband and I are both retired teachers. We may not be teaching anymore but we definitely like to stay busy! Our supervisor is our West Highland White Terrier named Lucy. We would love to see you over at The Robin’s Nest Designs.

I am so excited to be part of 30 Crafty Days of Halloween. I love everything about Fall and Halloween. Today, I am sharing a super cute Lightning Fast Halloween Banner.

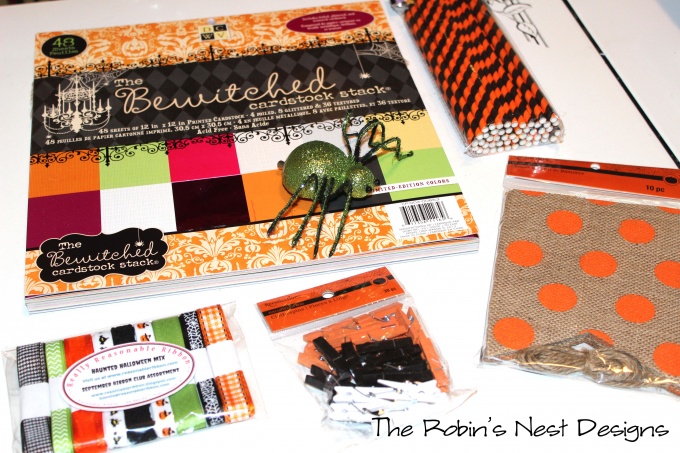
MATERIALS
Orange Polka Dot Halloween Burlap Banner Kit (Michaels)
Halloween Clothespins (Michaels)
Haloween Straws (Michaels)
Clip On Spider (JoAnn)
Glitter Cardstock for Lettering (JoAnn)
Ribbon (had at home-I belong to The Ribbon Club)
INSTRUCTIONS
Step 1: Decide on how big you want your banner to be and lay out the burlap banner pieces.

Step 2: Decide how long you want the jute string to be and cut to the desired length. Cut a straw into pieces. I did about 1 inch.

Step 3: Using the clothespins, attach the banner pieces to the jute. Add the piece of straw in between as you go along.

Step 4: Add lettering. I used my Silhouette to cut out the lettering and attached with hot glue. You can also buy lettering at the craft store.

Step 5: Add any desired embellishments. I used a glittery spider that clips on from JoAnn Crafts.

Step 6: I tied a bit of ribbon at the end on both sides of the banner just to make sure it wouldn’t slide at all.

Hang it up and enjoy! I hope you have enjoyed this Lightning Fast Halloween Banner project. Here are a few other things you might like:
Have a great day!


