
Photo credit: DK Brittain Photography
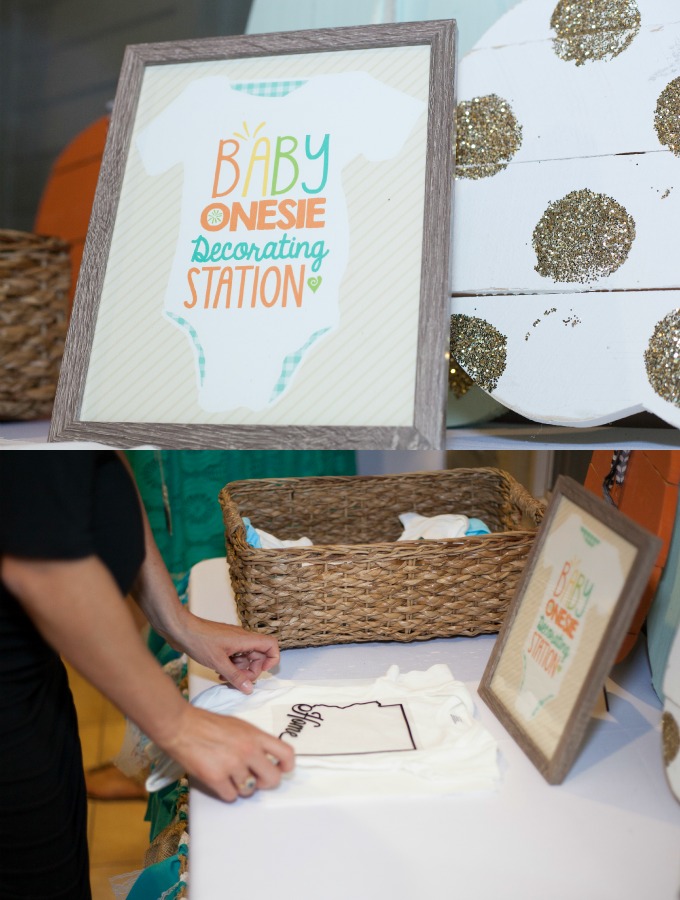
I love hands on activities at baby showers and dread the traditional, boring games. So, when I was put in charge of planning a baby shower for two of my closest friends, I scoured the internet for ideas and came up shorthanded. I knew I wanted to have a onesie decorating station at the party, but I also wanted the onesies to be nice enough that the moms would actually use them. I saw plenty of fabric markers and puffy paint decorating stations, which are fun, but the end results are not that pretty. I broke out my Cricut machine to create a onesie iron on station. The results were super cute, if I do say so myself. Here’s how you can plan a onesie iron on station of your own.

Step 1: Use fabric dye to hand dye your onesies and wash in baby friendly detergent, so they are ready for wear. Pick up dye colors that match your party scheme. Not only is this super easy to do, it’s much cuter than decorating plain white onesies and the moms-to-be will appreciate the variation. I folded my onesies and placed them on a tiered tray from World Market for easy access on the decorating table.
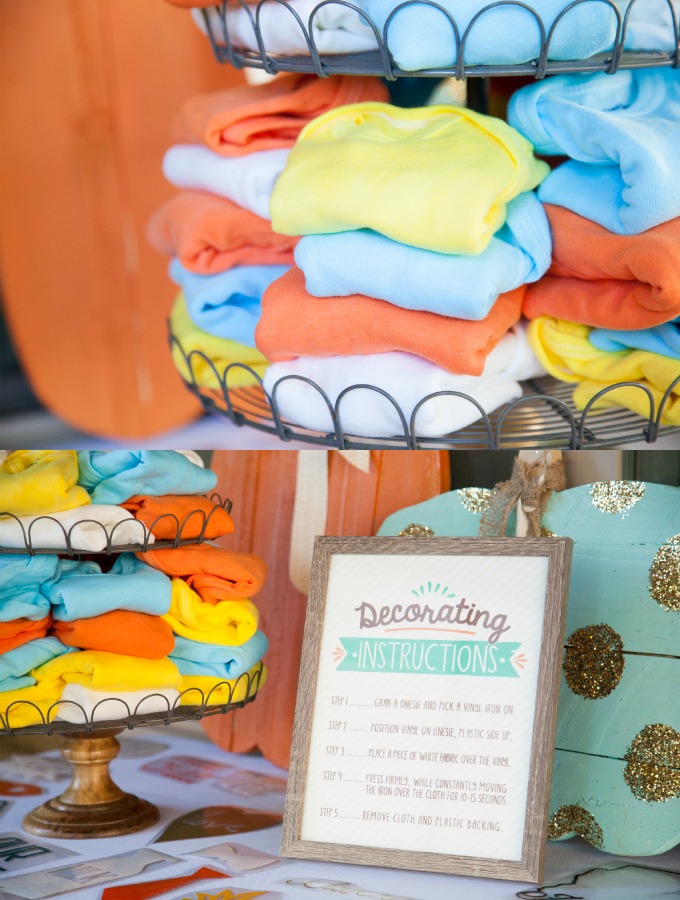
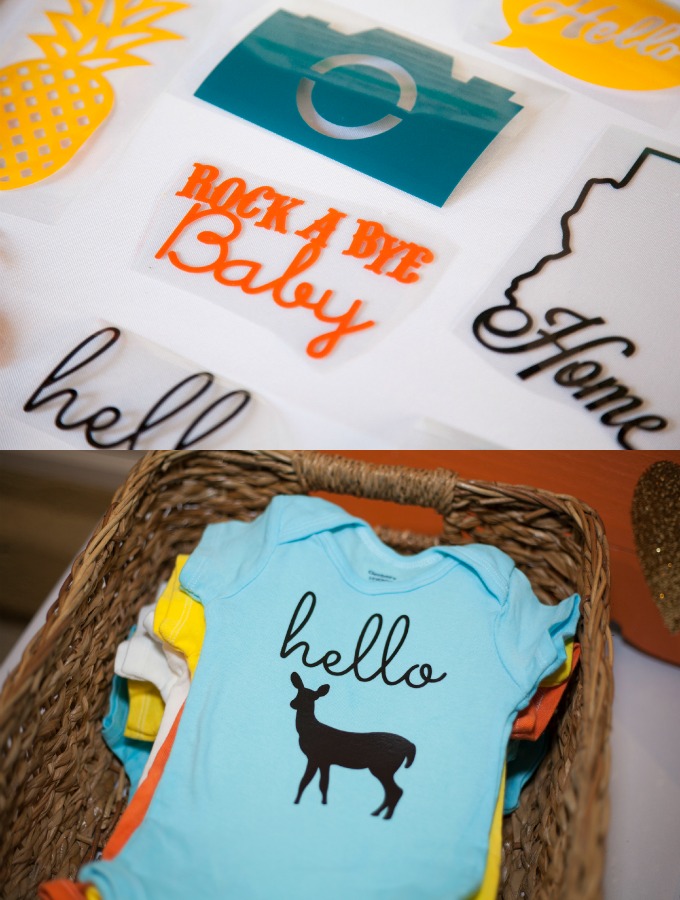
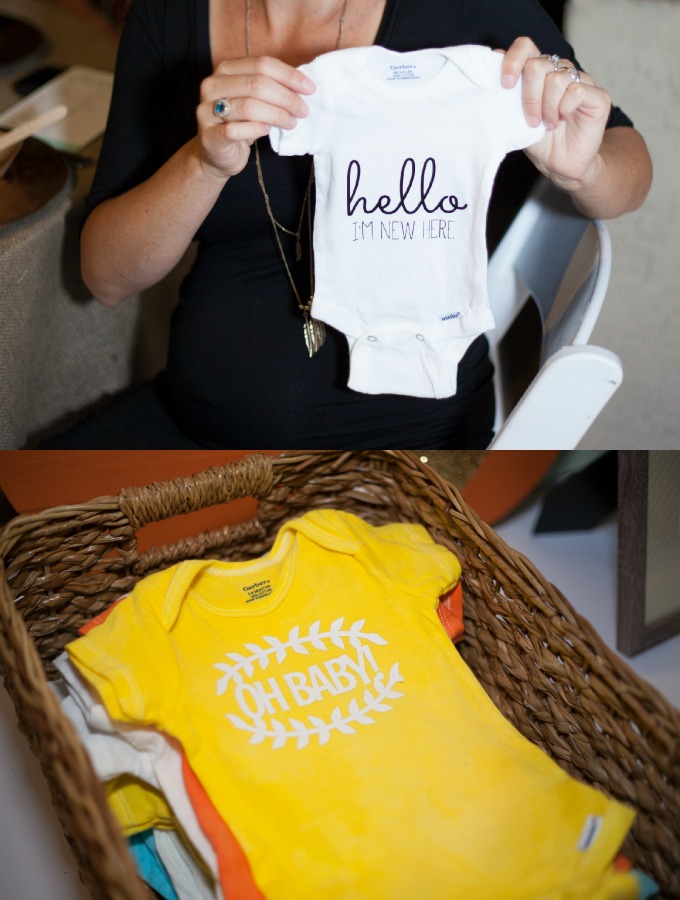
Step 2: Gather your iron on vinyl. I stuck with my party colors and also added in some gold, because gold vinyl is just plain fun! Use a vinyl cutter, like a Cricut, to cut out the iron on images. You’ll want to make sure to reverse the image before you cut for iron ons. I recommend weeding (or peeling away the excess vinyl) all of the iron ons before the party, but you can also have your guests do it. If they aren’t familiar with working with vinyl, you might have to assist them. I laid my iron ons out on a 4 ft table, near the onesies, for guests to choose from. You can now purchase iron on decals from my shop HERE.
Step 3: Have the instructions handy. My instructions read:
- Grab a onesie and pick a vinyl iron on.
- Position vinyl on onesie, plastic side up.
- Place a piece of white fabric over the vinyl.
- Press firmly, while constantly moving the iron over the cloth for 10-15 seconds.
- Remove cloth and plastic backing.

Step 4: Have a helper, who is familiar with iron on vinyl, man the iron on station. There are quite a few steps, which might be confusing to vinyl novices, so it might be helpful to have someone stationed by the onesie table to assist when needed. My co-host was able to help at the onesie station, while I greeted guests at the door. Plus, it’s just a good idea to have someone watching the hot iron to prevent accidents.

Step 5: Have a separate table available for ironing. I don’t recommend an ironing board, because it isn’t firm enough to get a good press. Guests tended to congregate at the iron on and onesie selection table. They moved on to the ironing table once they were ready to iron. I recommend using a new iron or an iron dedicated to crafting, that doesn’t have water inside. I also recommend cutting up pressing cloths to use over the vinyl, so as not to dirty the onesie. I added a basket to the ironing table for guests to place their completed onesies in.

Step 6: Have the mom(s)-t0-be pick their favorite onesies after everyone has had a chance to decorate one. The winners can receive a prize.

You can now purchase iron on decals from my shop HERE!
You might also like:


5 Responses
Very beautiful. Can you please include printables of the images that you used?
Hello! Where did you find the iron on templates/designs? They are so cute !!!
Some came from Etsy and most were found in the Cricut design studio 🙂
Where did you purchase onesies in bulk? Thanks!
I actually just purchased several packs at Walmart/Target.